

There’s something downright magical about biting into a homemade Tart Cherry Pie with Lattice Crust Recipe—the bright tartness of cherries paired with that flaky, golden lattice top is just irresistible. I love this pie because it brings a perfect balance of sweet and tangy with a stunning presentation that always wows guests.

Why You’ll Love This Recipe
- Simple yet impressive: The lattice crust makes this pie look bakery-worthy without complicated steps.
- Perfect balance of flavors: Tart cherries deliver that tangy kick while the almond and vanilla extracts add warmth and depth.
- Flexible ingredients: You can easily make it with frozen cherries and store-bought dough for weeknight baking.
- Great make-ahead dessert: It tastes even better after sitting a day to let the flavors meld beautifully.
Ingredients You’ll Need
Getting the balance of sweet and tart cherries right is key for this pie, and combining that with a buttery flaky crust creates the perfect bite. Picking quality ingredients really helps your Tart Cherry Pie with Lattice Crust Recipe shine.

- Pie dough: I usually use either homemade double crust dough or store-bought frozen rolled dough for convenience.
- Tart or sour cherries: These give the pie its signature tang—look for jars or cans packed in water or cherry juice for the best flavor.
- Almond extract: This little flavor booster adds a wonderful nutty note that pairs beautifully with cherries.
- Vanilla extract: I find pure vanilla deepens the overall taste without overpowering the fruitiness.
- Lemon juice: Brings brightness and balances the sweetness perfectly.
- Cane sugar or maple sugar: Maple sugar adds a lovely caramel hint, but cane sugar works just fine too.
- Tapioca starch (or cornstarch): This thickens the juicy filling without making it gummy.
- Sea salt: Enhances all the flavors, so don’t skip it.
- Unsalted butter: Small pieces dotted on top make the filling richer as it bakes.
- Egg yolk and cream: Used for brushing the lattice crust so it bakes up shiny and golden.
- Unbleached organic cane sugar: A sprinkling on top finishes the pie with a delicate crunch.
Variations
I like to switch things up sometimes, and this Tart Cherry Pie with Lattice Crust Recipe is a fantastic base for experimentation. Feel free to tailor it to your taste or dietary needs—you’ll be surprised how adaptable it is.
- Using fresh cherries: When cherry season hits, I love trying fresh tart cherries instead of canned—just increase the tapioca a bit to handle the extra juice.
- Gluten-free crust: I once made this with a gluten-free pie dough and it turned out beautifully; just watch your bake time since GF dough browns faster.
- Vegan version: Swap butter for coconut oil and use a plant-based milk for the egg wash—plus, maple sugar keeps it naturally sweet.
- Adding spices: A pinch of cinnamon or cardamom gives the filling an unexpected warm twist that my family adored.
How to Make Tart Cherry Pie with Lattice Crust Recipe
Step 1: Prepare Your Base and Preheat
Start by positioning your oven rack at the bottom and preheat to 425°F—that high heat is key for a crispy crust. Roll out one disk of your pie dough on a lightly floured surface, making it about 1 inch larger than your pie plate diameter. I check this by flipping the plate on top of the dough—it’s a neat trick that saves guesswork. Once rolled, carefully fit it into the pie plate, then cover loosely with plastic wrap and pop it in the fridge while you prepare your filling.
Step 2: Mix the Cherry Filling
Drain your cherries but save about 1/4 cup of the juice—it’s going back into the filling for extra flavor. In a big bowl, combine cherries, reserved juice, almond and vanilla extracts, and fresh lemon juice. In a separate bowl, whisk your sugar, tapioca starch, and sea salt, then mix that evenly into the cherries. This step helps thicken the filling and ensures every bite tastes just as good as the last.
Step 3: Create the Lattice Crust
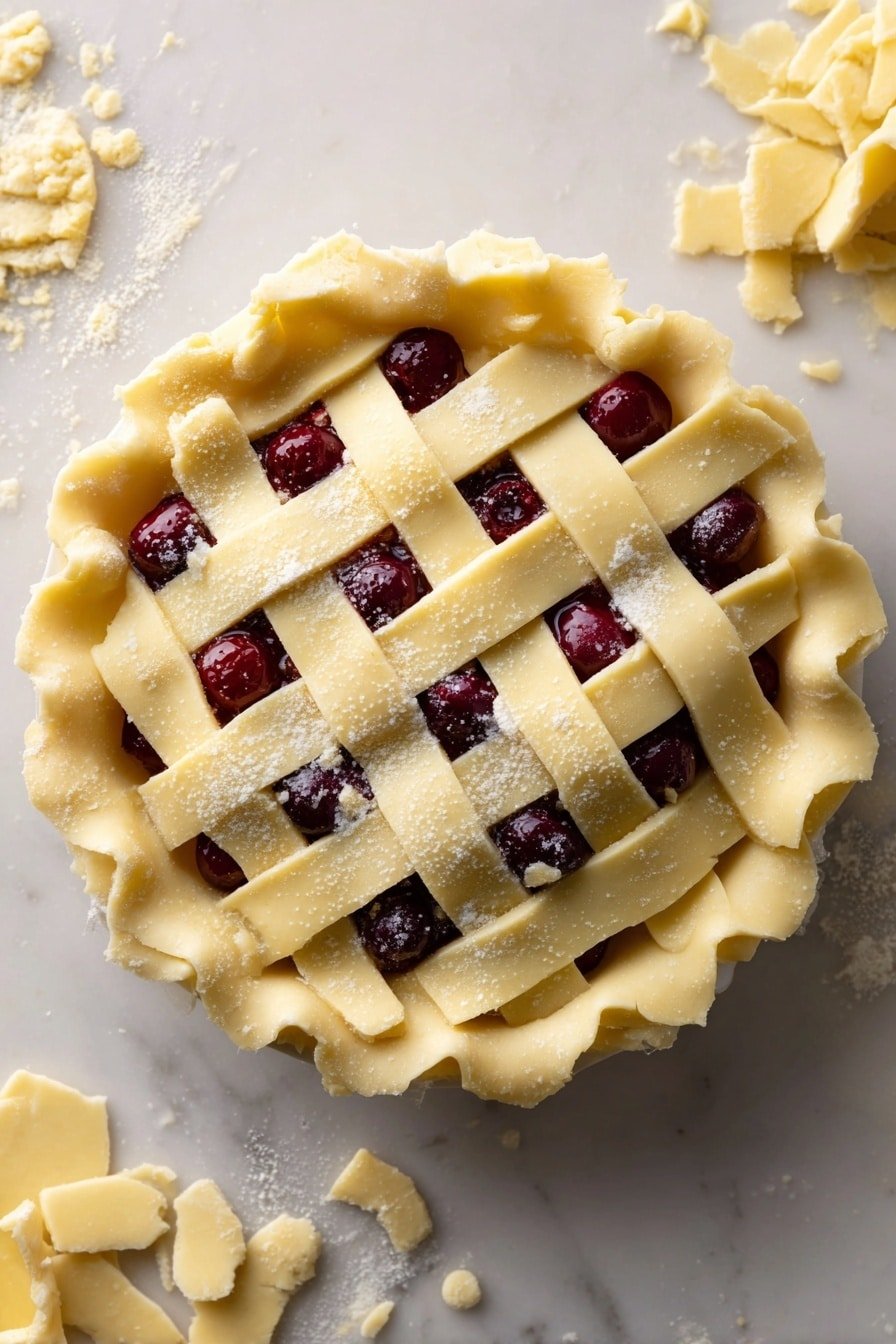
Roll out the second pie dough disk into about a 12-inch circle. Cut it into 8 equal strips; thinner strips make a more delicate lattice, but I usually stick with eight for ease. Pour the cherry filling into the chilled crust and dot the top with those small butter pieces. Now the fun part—lay four dough strips evenly spaced over the pie, then weave the remaining strips in a classic lattice pattern by folding alternating strips back as you work across. Trust me, it’s easier than it sounds, and looks gorgeous every time.
Step 4: Egg Wash and Sugar Sprinkle
Whisk together the egg yolk and cream, then gently brush it over the lattice crust—this gives it that stunning golden shine and helps sugar stick. Sprinkle a teaspoon or two of unbleached cane sugar over the top for a slight crunch. I usually skip brushing the outer edge of the crust with egg wash so it doesn’t brown too quickly.
Step 5: Bake and Cool
Place the pie on a foil-lined baking sheet to catch any drips and bake on the bottom rack for 40 minutes at 425°F. Then lower the heat to 375°F and bake another 20 to 30 minutes, keeping an eye out for bubbling juices and a golden crust. If the edges brown too fast, tent the pie with foil—this has saved many of my pies from over-browning. Let the pie cool at least four hours before slicing; patience here really pays off because the filling sets up beautifully and the flavors deepen.
Pro Tips for Making Tart Cherry Pie with Lattice Crust Recipe
- Keep dough cold: I always chill my dough between handling to stop it from getting sticky and keep that flakiness.
- Use tapioca starch: I learned that tapioca gives a clearer, glossy filling compared to flour and avoids that pasty texture.
- Watch your oven temperature: Starting hot helps set the crust quickly, then lowering temp prevents overbrowning, a trick I discovered after many trials.
- Don’t rush cooling time: I’ve learned the flavorful filling needs time to thicken, so resist slicing too early!
How to Serve Tart Cherry Pie with Lattice Crust Recipe

Garnishes
I keep garnishes simple—sometimes just a scoop of vanilla bean ice cream or a dollop of fresh whipped cream. The creamy cold contrast against the warm pie is divine. A sprinkle of toasted sliced almonds adds a subtle crunch and plays off the almond extract flavor nicely.
Side Dishes
This pie shines as a dessert but also pairs beautifully with a sharp cheddar cheese plate or even a cup of spiced chai or black coffee to balance the tartness. For casual get-togethers, I love serving it alongside fresh fruit salad or a simple green salad with a zesty citrus vinaigrette.
Creative Ways to Present
For special occasions, I’ve woven a heart shape or used thinner lattice strips for a more delicate look. Sometimes I dust the finished pie with a little powdered sugar in a pretty design or add edible flowers around the plate for an extra charm. It’s all about making the pie feel a bit festive without overcomplicating the gorgeous natural look of the lattice.
Make Ahead and Storage
Storing Leftovers
After fully cooled, I cover the pie loosely with foil and keep it at room temperature for up to two days—that’s when it tastes best. Beyond that, storing it in the fridge helps extend freshness. I’ve found that chilling a bit actually makes cutting neater and flavors meld even more.
Freezing
I occasionally freeze unbaked pies prepared with this filling—wrap tightly in plastic and foil before freezing. When ready, bake from frozen by adding extra time and keeping an eye on the crust color. Freezing baked leftovers works well too, but the crust can lose some crispness.
Reheating
To enjoy leftovers warm, I reheat slices at 300°F for about 10-15 minutes on a baking sheet, uncovered. This brings back some crispness to the crust without drying out the filling—microwaving tends to make it soggy, so I usually avoid that.
FAQs
-
Can I use fresh cherries instead of canned for this Tart Cherry Pie with Lattice Crust Recipe?
Absolutely! Fresh tart cherries make a lovely filling but tend to have more juice, so you might want to increase the tapioca starch slightly to ensure the filling thickens properly. Also, pitting the cherries ahead takes some extra time, but the fresh flavor is worth it.
-
How do I prevent a soggy bottom crust on this pie?
I recommend baking the pie on the lower rack to promote better bottom crust browning. Using a foil-lined baking sheet underneath helps, and allowing the pie to cool fully before serving gives the crust time to firm up. Some people add a thin layer of breadcrumbs or ground nuts on the bottom crust before filling to soak up excess juice, which can help too.
-
Can I prepare the lattice crust ahead of time?
Yes! You can cut the lattice strips, then keep them refrigerated, separated by parchment paper, for several hours or overnight. Just re-chill before weaving and baking to maintain that beautiful structure and flaky texture.
-
What’s the best way to store leftover Tart Cherry Pie with Lattice Crust Recipe?
Once cooled, store leftovers at room temperature lightly covered for up to two days, then move to the fridge covered with foil or plastic wrap. This way, the crust stays tender but not soggy, and the filling remains delicious.
Final Thoughts
This Tart Cherry Pie with Lattice Crust Recipe holds a sweet spot in my heart—and on my family’s dessert rotation. It strikes that perfect harmony between tart and sweet, with a crust that’s just the right amount of buttery and flaky. I honestly can’t recommend making it enough; once you do, you’ll understand why it’s become such a favorite in my kitchen. Give it a try—you’ll feel like you’ve captured a little slice of summer, even in the middle of winter.
Print
Tart Cherry Pie with Lattice Crust Recipe
- Prep Time: 30 minutes
- Cook Time: 1 hour 10 minutes
- Total Time: 1 hour 40 minutes plus 4 hours cooling
- Yield: 8 servings 1x
- Category: Dessert
- Method: Baking
- Cuisine: American
- Diet: Vegetarian
Description
A delightful Tart Cherry Pie featuring a flaky double crust with a beautiful lattice top. Filled with tangy tart cherries sweetened with natural cane sugar and thickened with tapioca starch for a perfectly set filling. The pie is enhanced with almond and vanilla extracts and finished with a buttery crust brushed with egg wash and sprinkled with sugar for a golden finish.
Ingredients
Pie Dough
- 1 recipe for pastry for a double crust pie or 2 frozen pie doughs (rolled, not in pie plate)
Filling
- 5 cups red tart or sour cherries (from 3 cans or jars, drained, juice reserved)
- 1/4 cup reserved cherry juice
- 1/4 teaspoon almond extract
- 1/4 teaspoon pure vanilla extract
- 1 teaspoon fresh lemon juice
- 2/3 cup cane sugar or maple sugar
- 1/4 cup tapioca starch (or cornstarch, arrowroot, or 1/3 cup all-purpose flour)
- 1/4 teaspoon sea salt
- 1 Tablespoon unsalted butter, cut into small pieces
Egg Wash
- 1 egg yolk
- 1 Tablespoon cream or milk
- 1–2 teaspoons unbleached organic cane sugar
Instructions
- Preheat Oven: Arrange a rack on the bottom of the oven and preheat the oven to 425 degrees Fahrenheit.
- Prepare Bottom Crust: Roll one disk of pie dough on a lightly floured countertop to 1 inch larger than the pie plate diameter. Fit it into the pie plate and cover loosely with plastic wrap. Refrigerate.
- Mix Filling: In a large bowl, combine cherries, reserved cherry juice, almond and vanilla extracts, and lemon juice. In a separate bowl, whisk cane sugar, tapioca starch, and sea salt. Add dry mix to cherry mixture and toss well.
- Prepare Lattice Top: Roll second dough disk to a 12-inch circle and cut into 8 equal-width strips. Pour filling into chilled pie crust and dot with butter. Lay 4 strips evenly spaced over filling. Weave remaining strips to form a lattice pattern by folding alternating strips back and layering crosswise strips, then unfolding.
- Apply Egg Wash: Whisk egg yolk and cream in a small bowl. Brush the lattice top with egg wash and sprinkle with sugar. Do not brush outer crust to prevent over-browning.
- Bake Pie: Place pie on a foil-lined baking sheet on bottom oven rack. Bake at 425°F for 40 minutes, then reduce oven to 375°F and bake an additional 30 minutes until juices bubble and crust is golden. Tent with foil if crust darkens too quickly.
- Cool and Serve: Allow pie to cool at least 4 hours before serving for the filling to set. Pie can be prepared a day ahead and stored at room temperature or refrigerated after two days, covered.
Notes
- Use tapioca starch for best filling consistency; cornstarch or arrowroot are acceptable alternatives.
- For a more pronounced almond flavor, increase almond extract slightly.
- The lattice top can be made with thinner or more strips for a delicate look.
- Placing the pie on a baking sheet helps catch drips and makes cleanup easier.
- Cooling the pie thoroughly is important to allow the filling to set properly.
- Freeze leftover pie without the egg wash topping for best texture on reheating.
- If crust browns too fast, cover loosely with foil to prevent burning.


