

There’s something so comforting about a pasta that combines rich, creamy sauce with that smoky kick of sausage—and that’s exactly what makes this Garlic Kielbasa Pasta Recipe a total winner in my kitchen. The garlic mingles perfectly with the kielbasa’s bold flavor, creating a dish that’s satisfying yet surprisingly simple to whip up any night of the week.

Why You’ll Love This Recipe
- Quick and Easy: This recipe takes just about 30 minutes from start to finish, perfect for busy weeknights.
- Comforting Flavors: The creamy garlic sauce paired with smoky kielbasa is like a warm hug on a plate.
- Versatile: You can easily adjust the spice level or swap ingredients to fit your mood or pantry.
- Family-Friendly: Everyone from kids to adults enjoys this hearty, flavorful pasta.
Ingredients You’ll Need
The magic of this Garlic Kielbasa Pasta Recipe lies in combining pantry staples with just a few fresh ingredients—each bringing its own special touch to the final dish. Choosing quality kielbasa and fresh garlic really elevates the flavor.

- Linguine: I like linguine because it holds onto the creamy sauce beautifully without becoming heavy.
- Extra virgin olive oil: Adds that subtle fruity base for browning your kielbasa.
- Kielbasa: Go for a smoked kielbasa for the best deep, savory flavor. Slice fairly thin for quick cooking.
- Unsalted butter: Makes the sauce silky and rich without overpowering the other flavors.
- Garlic: Fresh minced garlic is a must—it brings brightness and that classic pungent zip.
- Hoisin sauce: Adds a subtle sweetness and umami twist—you might be surprised how well it plays here.
- Soy sauce: Brings salty depth while balancing the creaminess.
- Sriracha: You can dial this up or down depending on how much heat you want.
- Heavy whipping cream: Creates a luscious, velvety sauce that coats every noodle.
- Parmesan cheese: Freshly grated for creamy, nutty goodness—and extra for garnish if you like.
- Fresh parsley: Brightens the dish with herbal freshness and looks pretty, too.
- Lemon wedges: A quick squeeze cuts through the richness and wakes up the flavors.
Variations
This Garlic Kielbasa Pasta Recipe is such a flexible starting point—I like to tweak it now and then to keep things interesting, and I encourage you to do the same. It’s fun to take this base in whatever direction your taste buds want to go!
- Vegetable Boost: I sometimes toss in sautéed bell peppers or spinach for extra color and nutrition—these add freshness without stealing the show.
- Heat Levels: For milder versions, reduce or omit sriracha; for spice lovers like me, I double it or add crushed red pepper flakes.
- Protein Swaps: I’ve tried smoked sausage or even spicy chorizo as stand-ins for kielbasa, and both give a delicious twist.
- Dairy-Free: You can substitute coconut cream instead of heavy cream and nutritional yeast for parmesan, and it still turns out amazing.
How to Make Garlic Kielbasa Pasta Recipe

Step 1: Cook Pasta to Perfect Al Dente
Bring a large pot of salted water to a boil and cook your linguine until it’s just al dente—meaning it still has a little bite. I always reserve about a cup of pasta water before draining, because that starchy water is pure gold and will help loosen the sauce later if needed.
Step 2: Brown the Kielbasa
Heat olive oil in a large skillet over medium heat. Once shimmering, add your sliced kielbasa in a single layer. Don’t overcrowd the pan—if you do, it’ll steam rather than brown. Cook for 4-5 minutes, stirring occasionally, until the edges get slightly crisp and browned. Transfer to a plate and set aside. I like this step because it really brings out the kielbasa’s smoky flavor and adds texture.
Step 3: Build the Creamy Garlic Sauce
Reduce heat to medium-low and melt your butter in the same skillet, scraping up those tasty browned bits from the kielbasa. Add the minced garlic, cooking just about 30 seconds until fragrant. Then whisk in hoisin sauce, soy sauce, and sriracha for that dynamic flavor punch. Slowly pour in the heavy cream while whisking to keep it silky smooth. Let it warm through for a minute or two—you want the sauce to come together nicely without boiling.
Step 4: Combine Pasta and Sauce
Add your cooked linguine straight into the skillet with the sauce and toss it to coat all those noodles. Stir in grated parmesan until it melts into a creamy, cheesy finish. If the sauce feels too thick, add reserved pasta water a little at a time until you reach that perfect silky consistency—I usually add about ¼ cup.
Step 5: Finish with Kielbasa and Serve
Return the browned kielbasa to the skillet and toss everything together for another minute or two until it’s all heated through. Serve the pasta topped with extra parmesan, a sprinkle of chopped fresh parsley, and a squeeze of lemon juice to brighten things up. That little citrus touch is a game-changer in balancing the richness.
Pro Tips for Making Garlic Kielbasa Pasta Recipe
- Reserve Pasta Water: Don’t skip saving that starchy pasta water—it’s perfect for loosening the sauce while keeping it silky.
- Don’t Overcook Garlic: Garlic burns quickly; cook it just until fragrant (about 30 seconds) to avoid bitterness.
- Brown Kielbasa in Batches: To get that perfect crisp edge, don’t crowd your pan—if needed, cook the kielbasa in batches.
- Adjust Heat Gradually: Add sriracha a bit at a time to hit your perfect spice level without overpowering the other flavors.
How to Serve Garlic Kielbasa Pasta Recipe

Garnishes
I love topping this pasta with freshly chopped parsley for a pop of color and freshness, plus an extra dusting of parmesan for that irresistible cheesy finish. And don’t skip a squeeze of lemon—this brightens everything and cuts through the creaminess beautifully.
Side Dishes
For sides, a simple green salad with a light vinaigrette is my go-to. I also like serving garlic bread or roasted veggies on the side to round out the meal. These add texture and keep things balanced without stealing the spotlight.
Creative Ways to Present
For a cozy dinner party, I’ve served this Garlic Kielbasa Pasta Recipe in individual shallow bowls garnished with a sprig of parsley and a lemon wedge on the side. It feels more special, and your guests appreciate the bright citrus finish personalized to taste.
Make Ahead and Storage
Storing Leftovers
I usually store leftovers in an airtight container in the fridge for up to 3 days. The flavors deepen overnight, which I love, but if you plan ahead, give it a quick warming and stir to refresh the sauce before serving again.
Freezing
This recipe freezes surprisingly well. I freeze individual portions in freezer-safe containers. Just thaw overnight in the fridge and reheat gently on the stove; the sauce stays creamy once warmed slowly.
Reheating
To reheat, I warm leftovers on low heat in a skillet with a splash of water or cream to loosen the sauce. This keeps the pasta from drying out and brings back that luscious texture like it’s freshly made.
FAQs
-
Can I use other types of pasta in this Garlic Kielbasa Pasta Recipe?
Absolutely! While linguine works great to hold the sauce, you can swap in spaghetti, fettuccine, penne, or even rigatoni. Just adjust the cooking time according to the package instructions and make sure to reserve pasta water for the sauce.
-
What’s the best kielbasa to use for this recipe?
I recommend smoked kielbasa for its robust flavor and texture. Turkey kielbasa can work if you want a lighter option, but the classic smoked pork version gives the best smoky, savory punch.
-
Can I make this recipe dairy-free?
Yes! Substitute the heavy cream with coconut cream or other plant-based cream alternatives and use nutritional yeast in place of parmesan cheese. The flavor profile will shift a bit but still be creamy and delicious.
-
Is this recipe spicy?
The recipe includes sriracha, which adds a mild to moderate heat depending on how much you add. You can easily omit or reduce it for a milder dish or increase if you prefer it spicy. It’s very adaptable to your heat preference.
-
How do I prevent the sauce from becoming too thick or clumpy?
Whisk the sauce ingredients slowly as you add them, especially when pouring in the cream. Using reserved pasta water a little at a time helps thin the sauce and keeps it silky without clumping. Also, avoid boiling the sauce once cream is added.
Final Thoughts
I absolutely love how this Garlic Kielbasa Pasta Recipe brings together simple ingredients into a bowl of big, comforting flavors that feels both special and totally doable any night. When I first tried it, I was surprised by how quickly it came together without skimping on taste. I’m confident you’ll enjoy whipping it up for yourself or feeding a crowd—trust me, your kitchen will smell amazing, and your family will go crazy for it!
Print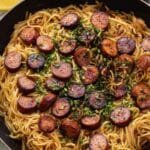
Garlic Kielbasa Pasta Recipe
- Prep Time: 10 minutes
- Cook Time: 20 minutes
- Total Time: 30 minutes
- Yield: 4 servings 1x
- Category: Main Course
- Method: Stovetop
- Cuisine: American
Description
This Garlic Pasta with Kielbasa is a flavorful and creamy dish featuring linguine tossed in a savory garlic sauce enhanced with hoisin, soy, sriracha, and parmesan, complemented by perfectly browned kielbasa. Ready in just 30 minutes, it’s a quick and satisfying meal for any night.
Ingredients
Pasta & Kielbasa:
- 12 ounces linguine
- 1 tablespoon extra virgin olive oil
- 14 ounces kielbasa, sliced into ¼-inch rounds
Creamy Garlic Sauce:
- 2 tablespoons unsalted butter
- 1 tablespoon garlic, minced
- 2 tablespoons hoisin sauce
- 2 tablespoons soy sauce
- 2 tablespoons sriracha
- ¼ cup (59.5 g) heavy whipping cream
- ¼ cup (25 g) grated parmesan cheese, plus more for garnish
- 1 tablespoon fresh parsley, chopped for garnish
- ½ medium lemon, cut into wedges, for squeezing over the pasta
Instructions
- Cook Pasta: Bring a large pot of salted water to a boil. Add the linguine and cook until al dente according to package directions. Reserve 1 cup of pasta water, then drain the rest and set the pasta and pasta water aside.
- Brown Kielbasa: In a large skillet over medium heat, add olive oil. Once hot and shimmering, add the sliced kielbasa in a single layer and cook for 4 to 5 minutes, stirring occasionally, until browned and slightly crisp on the edges. Depending on the size of your skillet, you may need to work in batches. Transfer kielbasa to a plate and set aside.
- Melt Butter and Cook Garlic: Reduce heat to medium-low. In the same skillet you browned the kielbasa, add butter and minced garlic. Cook for about 30 seconds, stirring frequently to avoid burning.
- Make Sauce: Stir in the hoisin sauce, soy sauce, and sriracha. Slowly pour in the heavy cream, whisking until smooth. Let the sauce warm through for 1 to 2 minutes to meld the flavors.
- Toss Linguine with Sauce: Add the cooked linguine to the skillet and toss to coat the noodles thoroughly in the creamy garlic sauce.
- Add Parmesan and Adjust Sauce: Stir in the parmesan cheese until melted and creamy. If the sauce is too thick, add reserved pasta water a splash at a time to loosen it to your desired consistency. (About ¼ cup recommended.)
- Combine Kielbasa and Pasta: Return the kielbasa to the skillet and toss everything together until heated through, about 1 to 2 minutes.
- Serve and Garnish: Serve warm, topped with extra parmesan cheese, chopped fresh parsley, and freshly squeezed lemon juice for brightness, if desired.
Notes
- Reserve some pasta water to adjust the sauce consistency as needed.
- If you prefer less spice, reduce or omit the sriracha.
- For a lighter version, substitute heavy cream with half-and-half or a lactose-free alternative.
- Kielbasa can be substituted with other smoked sausages or even cooked chicken slices.
- Use freshly grated parmesan for the best flavor and melting quality.
- Cook the garlic just until fragrant to avoid bitterness.


