

Nothing beats the melty goodness and savory flavors packed into this Easy Philly Cheesesteak Sliders Recipe. These little sandwiches turn the classic cheesesteak into a fun finger food – perfect for sharing and way easier than wrestling with a full-sized hoagie roll!

Why You’ll Love This Recipe
- Quick and Easy: You’ll have these sliders ready in under an hour, perfect for spontaneous gatherings or game day.
- Classic Flavors: The tender ribeye, sautéed peppers and onions, and gooey provolone hit all the right notes every time.
- Crowd-Pleaser: My family goes crazy for these sliders — they disappear faster than I can plate them!
- Great for Make-Ahead: You can prep many components earlier, and the sliders reheat beautifully without losing their flavor or texture.
Ingredients You’ll Need
The magic here lies in fresh, simple ingredients that come together for maximum flavor. Using ribeye steak sliced thin makes the meat tender and quick to cook, plus it soaks up the savory Worcestershire sauce beautifully.

- Ribeye steak: Look for well-marbled meat for juicy, tender slices. Ask your butcher to slice it thin for you if needed.
- Olive oil or butter: I usually go with olive oil for a bit of fruity richness, but butter adds a lovely depth too.
- Worcestershire sauce: This gives the meat a punch of umami—don’t skip it!
- Yellow onion: Sweet and caramelizes nicely when sautéed, balancing the beef.
- Green bell pepper: Provides a crunchy, fresh contrast and classic Philly flavor.
- Kosher salt and black pepper: Essential seasonings that enhance every component.
- Provolone cheese: Melts perfectly, creating that iconic cheesesteak stretchy, gooey effect.
- Slider buns: Soft but sturdy enough to hold all the fillings—and perfect size for sharing!
- Salted butter: For brushing buns and adding richness in every bite.
- Garlic and onion powder: These season the butter for the topping, adding aromatic flavor boosts.
- Dried parsley: A fresh touch of color and mild herbiness to finish.
Variations
I love to tinker with this Easy Philly Cheesesteak Sliders Recipe depending on what’s in season or who I’m feeding. Don’t be afraid to experiment—you’ll find ways to make it your own!
- Cheese variety: Swiss or American cheese creates a different mood—Swiss adds nuttiness, and American gives a creamy classic feel.
- Vegetarian version: Swap steak for sautéed mushrooms or thinly sliced seitan, and you’re still in for a savory treat.
- Spice it up: Adding a little hot sauce or crushed red pepper to the butter glaze takes these sliders up a notch in flavor.
- Sweet peppers: Red or yellow bell peppers can add a lovely sweetness if you want a little color and flavor change.
How to Make Easy Philly Cheesesteak Sliders Recipe

Step 1: Prep and Slice Everything Thinly
The key to getting that classic Philly texture is in the slicing. I like to slice the ribeye steak as thin as possible, which helps it cook super fast and stay tender. The onions and green peppers also want to be thin so they soften perfectly. Take your time here—it pays off when you bite in!
Step 2: Sear the Steak with Seasoning and Worcestershire Sauce
Heat your olive oil in a large skillet over medium-high heat. Toss in your steak slices and season with salt, pepper, and Worcestershire sauce right away. This sauce is a game-changer for flavor. Cook until the meat browns nicely and is cooked through—just a few minutes. Don’t overcrowd the pan or you’ll end up steaming the meat. If you have to, do this in batches.
Step 3: Sauté Onions and Peppers Until Soft and Sweet
Using the same skillet you cooked the steak in (that leftover flavor is gold!), add your sliced onions and green bell peppers. Season again lightly with salt and pepper. Let them cook until they’re soft and starting to caramelize—this usually takes about 5-7 minutes. Stir occasionally so nothing burns.
Step 4: Assemble Your Sliders on the Baking Sheet
Slice your slider buns in half horizontally—but keep the whole 12-pack connected as one for easy handling. Lay the bottom halves out on a greased baking dish or sheet. Layer your cooked steak evenly across the buns, then distribute the onions and peppers over the meat. Top with provolone slices—sometimes I tuck in a little extra cheese just because I can—and then close with the top buns.
Step 5: Butter and Bake the Sliders
Whip up a butter brush by melting the salted butter and mixing in garlic powder, onion powder, and dried parsley. This gives the buns a rich, flavorful crust that’s heavenly. Brush this mixture over the top buns thoroughly, then cover the tray with foil.
Bake at 350℉ for 10 minutes covered, then remove the foil to let the tops crisp up for another 10 minutes. This last step creates beautifully toasted tops without drying out the sandwich filling.
Pro Tips for Making Easy Philly Cheesesteak Sliders Recipe
- Thin Slice the Steak Yourself: I get better results slicing at home across the grain when the meat is slightly chilled instead of buying pre-sliced steak.
- Use the Same Pan for Layers of Flavor: Leaving the steak drippings in the skillet to cook onions and peppers adds unbelievable depth.
- Keep Buns Connected While Baking: This helps the sliders stay together and means less mess while transferring to plates.
- Don’t Skip the Butter Mixture: It’s the secret to crispy, flavorful buns that make these sliders next-level delicious.
How to Serve Easy Philly Cheesesteak Sliders Recipe

Garnishes
I usually keep garnishes simple: a sprinkle of fresh chopped parsley for color and some pickled jalapeños on the side if I want a spicy kick. Occasionally, a drizzle of your favorite hot sauce can add a nice pop without overpowering the classic flavors.
Side Dishes
My go-to sides for these sliders are crispy oven-baked fries or a fresh, crunchy coleslaw to balance the richness. A simple green salad with vinaigrette also pairs wonderfully for a lighter touch.
Creative Ways to Present
For parties, I love arranging these sliders on a large wooden board layered with parchment paper, paired with little ramekins of mustard, ketchup, and spicy mayo. It invites guests to grab and go and looks super inviting. You can also layer them in a warm cast-iron skillet for rustic charm.
Make Ahead and Storage
Storing Leftovers
I store leftover sliders in an airtight container or resealable bag in the fridge. They keep well for up to 4 days, which is great for quick lunches or snacks during a busy week.
Freezing
If I want to stash some for the future, I wrap each slider tightly in plastic wrap and then place them in a zip-top freezer bag. Frozen sliders maintain their flavor well for up to 2 months. Just thaw overnight in the fridge before reheating.
Reheating
To reheat, I prefer the oven set to 300°F for about 15 minutes covered with foil to prevent dryness. The microwave works in a pinch but can leave buns soggy, so I reserve that method only for quick bites.
FAQs
-
Can I use a different cut of beef for these sliders?
Absolutely! While ribeye is ideal for its tenderness and marbling, you can also use sirloin or flank steak. Just make sure to slice the meat thinly and cook it quickly to avoid toughness.
-
Can I make these sliders vegetarian or vegan?
Yes! Replace the beef with hearty mushrooms or plant-based meat substitutes and swap provolone with vegan cheese. Sauté everything similarly to keep that Philly flavor vibe.
-
How do I avoid soggy slider buns when reheating?
Reheat in the oven wrapped loosely with foil—you want some steam but also crispness. Avoid microwaving unless you’re okay with softer buns, as the microwave intensifies moisture.
-
Can I prepare these sliders ahead of time?
You can prep the meat and veggies the day before and assemble just before baking. Alternatively, assemble fully and store covered in the fridge; just add a few more minutes to bake time.
Final Thoughts
I absolutely love how this Easy Philly Cheesesteak Sliders Recipe makes classic comfort food approachable and fun. Whether it’s a casual family dinner or a lively weekend get-together, these sliders never disappoint. Give it a try — I promise you’ll find yourself making them again and again!
Print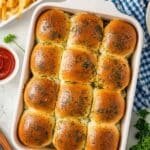
Easy Philly Cheesesteak Sliders Recipe
- Prep Time: 15 minutes
- Cook Time: 25 minutes
- Total Time: 40 minutes
- Yield: 12 sliders 1x
- Category: Appetizer
- Method: Baking
- Cuisine: American
Description
This Easy Philly Cheesesteak Sliders recipe features tender ribeye steak, sautéed onions and bell peppers, melted provolone cheese, and buttery slider buns seasoned with garlic and onion powder. Perfect for a crowd-pleasing appetizer or a savory snack, these sliders are baked to golden perfection and served warm.
Ingredients
Meat and Vegetables
- 1 ½ pounds ribeye steak – thinly sliced (or shaved)
- 1 yellow onion – thinly sliced
- 1 green bell pepper – thinly sliced
Seasonings and Sauces
- 2 tablespoons olive oil (or butter)
- 2 tablespoons Worcestershire sauce
- ½ teaspoon kosher salt (or to taste)
- ½ teaspoon black pepper
- 1 teaspoon garlic powder
- 1 teaspoon onion powder
- ½ tablespoon dried parsley
Dairy and Bread
- 8 slices provolone cheese
- 12 slider buns
- 4 tablespoons salted butter – melted
Instructions
- Preheat Oven: Preheat your oven to 350℉ and lightly grease or spray your baking pan to prepare for the sliders.
- Prepare Ingredients: Thinly slice the ribeye steak, onion, and green bell pepper so they cook evenly and quickly.
- Cook Steak: Heat olive oil in a large skillet over medium-high heat. Add the sliced ribeye and season with ½ teaspoon salt, ¼ teaspoon black pepper, and 2 tablespoons Worcestershire sauce. Cook until the steak is browned and cooked through, then remove from the skillet and set aside in a bowl.
- Sauté Vegetables: Using the same skillet, add the thinly sliced green bell pepper and onion. Season with salt and pepper to taste, then sauté until the vegetables are soft and tender. Remove from heat.
- Assemble Sliders: Slice the slider buns in half horizontally, keeping all buns connected as a 12-pack. Place the bottom halves on the greased baking sheet. Evenly layer the cooked steak over the buns, followed by the sautéed onions and bell peppers. Add 8 slices of provolone cheese on top, then cover with the top halves of the buns.
- Prepare Butter Mixture: Melt the salted butter and stir in garlic powder, onion powder, and dried parsley until well combined.
- Brush and Bake: Brush the buttery seasoning mixture generously over the tops of the slider buns. Cover the sliders with foil and bake for 10 minutes. Then remove the foil and bake uncovered for an additional 10 minutes until the tops are golden and cheese is melted.
- Serve: Remove the sliders from the oven and serve immediately while warm for the best taste and texture.
Notes
- For best slicing, partially freeze the ribeye steak before thinly slicing to make it easier.
- Substitute provolone with mozzarella or American cheese for a different melt and flavor profile.
- Leftover sliders can be stored in an airtight container in the refrigerator for up to 4 days.
- Reheat leftovers in the oven at 300°F for 15 minutes or microwave for 30-60 seconds; microwave reheating may cause the buns to become slightly soggy.
- If desired, you can add sautéed mushrooms or hot peppers for extra flavor and heat.


