

There’s something irresistibly cozy about a warm, tender bar bursting with juicy strawberries and a crumbly, buttery crust. This Strawberry Crumble Bars Recipe is just that—it’s the kind of treat that feels like sunshine in every bite, perfect whether you’re sharing with friends or sneaking one for yourself after a long day.

Why You’ll Love This Recipe
- Bursting with Fresh Strawberries: The filling is rich, juicy, and perfectly sweetened to let the strawberries shine.
- Buttery Crumble Texture: The almond and oat flour crust crumbles delicately with every bite, giving it a homemade feel.
- Easy to Make: No fancy skills needed—just mix, bake, and enjoy.
- Versatile and Customizable: You can swap ingredients and tweak flavors easily to suit your taste or dietary needs.
Ingredients You’ll Need
The ingredients in this Strawberry Crumble Bars Recipe come together in perfect harmony. I love how the combination of almond and oat flours creates a tender yet slightly chewy crust, while the fresh strawberries sway the flavor in a bright, fresh direction. Here’s a bit about each key ingredient before you dive in:

- Almond flour: Use fine almond flour, not almond meal, to ensure the bars have a soft, even texture without grittiness.
- Oat flour: Adds a subtle nuttiness and helps balance the almond flour to prevent the crust from being too dense.
- Oats: These contribute delightful chewiness and a rustic element to the crumb topping.
- Salted butter: Provides richness and saltiness that elevates all the flavors; you can swap for vegan butter or coconut oil for a dairy-free version.
- Pure maple syrup: Sweetens naturally while imparting a warm, caramel-like depth.
- Vanilla extract: Adds warmth and complexity to the crust’s flavor.
- Fresh strawberries: The star of the filling, bring your freshest and juiciest for the best results.
- Cornstarch or arrowroot starch: Thickens the strawberry filling so it’s not runny but perfectly spreadable.
- Lemon juice: Brightens the filling and balances the sweetness.
- Almond extract: A subtle touch that complements the berries but can be swapped with vanilla if preferred.
Variations
I like to keep my Strawberry Crumble Bars Recipe mostly traditional, but sometimes I throw in little tweaks depending on the season or mood. Feel free to make it yours — experimentation is part of the fun!
- Nut-Free Crust: I once switched out the almond flour for a nut-free oat crust, using a recipe I borrowed from my blueberry pie bars to keep it allergy-friendly without sacrificing texture.
- Mix of Berries: Swapping half the strawberries for raspberries or blueberries gives a beautiful twist and adds more complex, tangy notes.
- Vegan Version: Using melted coconut oil or vegan butter for the crust and maple syrup keeps the bars plant-based and just as tasty.
- Extra Crunch: Sprinkle some chopped toasted pecans or walnuts over the crumble topping for added texture and nuttiness.
How to Make Strawberry Crumble Bars Recipe

Step 1: Prepare Your Pan and Preheat the Oven
Start by preheating your oven to 350°F. Line a 9×9-inch pan with parchment paper—this is a must to make removing the bars so much easier later. I always spray a little nonstick cooking spray on the pan before placing the parchment to keep everything from sticking, especially along the edges.
Step 2: Mix the Crust and Crumble Topping
In a big bowl, combine the almond flour, oat flour, oats, and salt. Then pour in your melted butter, maple syrup, and vanilla extract. Using a fork to stir helps keep the mixture crumbly without overworking it. I always reserve about 1 cup of this mixture for the crumble topping; the rest gets pressed evenly into your pan as the base crust. Press firmly with your hands – this step sets the foundation for a sturdy but tender bar.
Step 3: Bake the Crust
Bake the crust for about 10 minutes. You’ll notice it starts to set and get a light golden color. This pre-bake step helps prevent a soggy bottom once the strawberry filling goes on. Just pull it out and leave the oven on—you’ll be putting it back in soon!
Step 4: Cook the Strawberry Filling
While the crust’s baking, toss your diced strawberries, maple syrup, cornstarch, lemon juice, and almond extract into a medium pot over medium heat. Stir regularly and bring it to a gentle simmer. You want the mixture to thicken slightly (3 to 5 minutes), turning juicy but not soupy. This step is crucial — if it’s too thin, your bars will be soggy; too thick, and it’ll be hard to spread. I trust my eye and touch here, and usually leave it just shy of pudding consistency.
Step 5: Assemble and Bake the Bars
Pour the luscious strawberry filling over your warm crust, spreading it out evenly. Then sprinkle the reserved crumble mixture on top, breaking it apart gently if needed so it covers well but doesn’t compact. Pop it back into the oven for a longer bake—about 35 to 45 minutes. You’re looking for bubbling juices at the edges and a golden brown topping. This is where the magic really happens!
Step 6: Cool Completely Before Serving
This is an important one: let the bars cool fully, either on your counter or to speed things up, in the fridge. When I first made these, I sliced them too soon, and they just fell apart. Patience pays off here because the filling firms up perfectly, and the bars cut like a dream.
Pro Tips for Making Strawberry Crumble Bars Recipe
- Choose Ripe Strawberries: I learned the hard way that underripe berries make the filling less flavorful—always pick the juiciest, red-ripe ones for best taste.
- Don’t Skip the Prebake: Baking the crust first keeps the base crisp and stops it from getting soggy under the filling.
- Use a Fork for Crumble Mixing: Mixing the topping gently with a fork prevents it from turning into a dough, keeping that perfect crumbly texture.
- Cool Bars Fully Before Cutting: I avoid messy slices by chilling the bars so the filling firms up nicely, even if it tests my patience.
How to Serve Strawberry Crumble Bars Recipe

Garnishes
I love serving these bars with a simple dusting of powdered sugar or a drizzle of melted dark chocolate for an extra touch of indulgence. Sometimes I add a few fresh strawberry slices on top to make it look as good as it tastes. For special occasions, a scoop of vanilla ice cream on the side is seriously the ultimate pairing.
Side Dishes
This dessert feels great alongside fresh fruit salad or a cup of freshly brewed coffee or tea. I’ve even paired it with a dollop of Greek yogurt mixed with honey to balance sweetness with creaminess—so good for brunch or afternoon gatherings.
Creative Ways to Present
For a party, I arranged the bars on a wooden board surrounded by edible flowers and fresh mint leaves — it made the dessert table sooo inviting! You can also cut them into bite-sized squares and serve on mini dessert cups with a tiny spoon for an easy grab-and-go treat.
Make Ahead and Storage
Storing Leftovers
I usually store leftover strawberry crumble bars in an airtight container in the fridge. They keep beautifully for up to 5 days. The crust stays tender but won’t get soggy, and the strawberry filling remains deliciously juicy without being too runny.
Freezing
If I’m making these bars ahead of a busy week, I cut them into portions and freeze in a single layer on a baking sheet before transferring to a freezer-safe bag. They freeze wonderfully for up to 3 months. Just thaw in the fridge overnight before serving.
Reheating
Reheating leftover bars is easy—pop them in the microwave for 20–30 seconds or in a warm oven (around 300°F) for 10 minutes. I like to serve them slightly warm, especially with a scoop of ice cream. Just be careful not to overheat so the crumble topping doesn’t dry out.
FAQs
-
Can I use frozen strawberries for this recipe?
Yes! Frozen strawberries work in a pinch, but make sure to thaw and drain excess water so the filling doesn’t become too watery. You might also need to cook the filling a bit longer to thicken it properly.
-
What can I substitute for almond flour if I have a nut allergy?
You can use additional oat flour or try a gluten-free all-purpose flour blend. For a nut-free crumble topping, I recommend trying my blueberry pie bar crust recipe, which omits nuts entirely.
-
How do I know when the bars are done baking?
Look for bubbling juices around the edges and a golden-brown crumble topping. The filling should be thickened and set, not liquidy. Letting the bars cool completely will also firm up the filling.
-
Can I make these bars gluten-free?
Absolutely! This recipe uses oat and almond flours, which are naturally gluten-free. Just be sure to check that your oats are certified gluten-free to avoid cross-contamination.
-
How long do these bars keep at room temperature?
Due to the fresh fruit filling and butter content, I recommend storing these bars in the fridge. Left at room temperature, they’ll last about 1 day before the filling starts to lose its texture.
Final Thoughts
Honestly, this Strawberry Crumble Bars Recipe has become one of my favorite desserts—there’s just something so comforting about the sweet, tangy filling and crumbly base that feels like a warm hug. Whether you make it for a busy weeknight treat or a weekend get-together, I hope you enjoy every luscious bite as much as my family and I do. Give it a go—you won’t be disappointed!
Print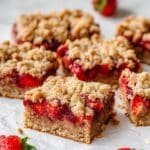
Strawberry Crumble Bars Recipe
- Prep Time: 20 minutes
- Cook Time: 45 minutes
- Total Time: 1 hour 5 minutes
- Yield: 16 servings 1x
- Category: Dessert
- Method: Baking
- Cuisine: American
- Diet: Vegetarian
Description
These Strawberry Crumble Bars feature a buttery oat and almond crust topped with a luscious, homemade strawberry filling. Perfect for dessert or a sweet snack, they combine fresh fruit with a crunchy crumble topping baked to golden perfection.
Ingredients
For the crust and topping:
- 1 ½ cups (168g) packed fine almond flour (do not use almond meal)
- 1 ½ cups (138g) oat flour
- ¾ cup (71g) oats
- ½ teaspoon salt
- ½ cup (113g) melted and cooled salted butter (or sub vegan butter or melted coconut oil)
- ⅓ cup (104g) pure maple syrup
- ½ teaspoon vanilla extract
For the filling:
- 1 pound (454g) fresh strawberries, diced
- 3 tablespoons pure maple syrup
- 1 tablespoon cornstarch (or arrowroot starch)
- 1 teaspoon lemon juice
- ¼ teaspoon almond extract (or sub vanilla extract)
Instructions
- Preheat the Oven: Preheat your oven to 350 degrees Fahrenheit. Line a 9×9 inch pan with parchment paper and spray it with nonstick cooking spray to prevent sticking.
- Prepare the Crust and Topping: In a large bowl, mix together almond flour, oat flour, oats, and salt using a fork. Add melted butter, pure maple syrup, and vanilla extract, stirring until a crumble forms and dough begins to clump. Reserve 1 cup of this mixture for the topping and press the rest evenly into the bottom of the pan using your hands.
- Bake the Crust: Bake the crust for 10 minutes until set but not browned, then remove from the oven.
- Make the Strawberry Filling: While the crust bakes, place a medium pot over medium heat. Add strawberries, maple syrup, cornstarch, lemon juice, and almond extract. Bring to a simmer, then reduce heat to low and cook for 3-5 minutes, stirring frequently until the mixture thickens and strawberries release their juices.
- Assemble and Bake: Pour the strawberry filling over the baked crust and spread evenly with a spoon. Sprinkle the reserved crumble topping over the filling. Bake for 35-45 minutes until the filling bubbles along the edges and the topping is golden brown.
- Cool and Serve: Let the bars cool completely in the pan to set; you can refrigerate them to speed up cooling. Once cooled, cut into 16 bars. Serve plain or with vanilla ice cream for a delicious dessert or snack.
Notes
- To make these bars nut-free, substitute the almond flour and crumble with the crust and crumble from a blueberry pie bar recipe that doesn’t use nuts.
- Using parchment paper and nonstick spray ensures easy removal without sticking.
- Allow bars to cool fully before cutting to prevent them from falling apart or use the fridge to cool faster.
- Feel free to substitute coconut oil or vegan butter for dairy butter to make the recipe vegan friendly.
- For a different fruit twist, try raspberries or mixed berries instead of strawberries.


