There’s something truly magical about a rich, deeply chocolatey cake that’s so tender it practically melts in your mouth. This Moist Chocolate Layer Cake Recipe is exactly that—packed with flavor, silky texture, and just the right crumb every time. I love sharing this one because it’s become a guaranteed crowd-pleaser at all my gatherings.

Why You’ll Love This Recipe
- Unbelievably Moist Texture: The combination of coffee, buttermilk, and oil keeps the cake perfectly tender and never dry.
- Deep Chocolate Flavor: Using espresso powder and natural cocoa powder really amps up that rich cocoa taste without bitterness.
- Simple Yet Elegant: The recipe is straightforward but produces a cake you’ll be proud to serve at any celebration, no fancy equipment necessary.
Ingredients You’ll Need
The magic of this cake comes from a few well-chosen ingredients that balance moisture, flavor, and structure beautifully. I always recommend using good-quality cocoa powder and fresh coffee to get that rich result.

- All-purpose flour: Use spooned and leveled flour to avoid a dense cake—too much flour can dry it out.
- Unsweetened natural cocoa powder: This gives a bright chocolate flavor; Dutch process cocoa works too but may alter the cake’s rise slightly.
- Granulated sugar: Regular sugar helps create that tender crumb and balanced sweetness.
- Baking soda & baking powder: Together they ensure your layers rise evenly with a light texture.
- Salt: Just a touch enhances all those chocolate notes.
- Espresso powder (optional): A game-changer—boosts the chocolate flavor without tasting like coffee.
- Vegetable oil: Keeps the cake moist longer than butter alone—plus it blends seamlessly with the other liquids.
- Eggs at room temperature: They help with structure and fluffiness; bring them to room temp for better mixing.
- Pure vanilla extract: Adds warmth and depth to the flavor.
- Buttermilk at room temperature: The acidity tenderizes the cake and reacts with leavening for lift.
- Freshly brewed strong hot coffee: Replaces water to deepen the chocolate taste and keep things moist.
Variations
While I love sticking to the classic version, I often tweak this Moist Chocolate Layer Cake Recipe to suit different occasions or dietary needs. Don’t hesitate to make it your own!
- Gluten-Free Version: Swap all-purpose flour with a blend designed for baking to keep the same soft texture.
- Vegan Adaptation: Replace eggs with flax eggs and use a dairy-free milk substitute; I’ve tried this and got surprisingly good results by adjusting baking times slightly.
- Chocolate Ganache Frosting: Sometimes I substitute the buttercream for a silky ganache when I want a richer finish.
- Adding Fruit Layers: Fresh raspberries or cherries between layers add a lovely tart contrast—my family especially likes this during the holidays.
How to Make Moist Chocolate Layer Cake Recipe

Step 1: Prep Your Pans and Oven
Start by preheating your oven to 350°F (177°C). I always grease two 9-inch cake pans thoroughly, then line them with parchment paper rounds. Greasing the parchment ensures the cakes release perfectly without any sticking—trust me, it’s worth the extra step for a clean edge.
Step 2: Mix the Dry Ingredients
Whisk together the flour, cocoa powder, sugar, baking soda, baking powder, salt, and espresso powder (if using) in a large bowl. This step evenly distributes everything to help the cake rise uniformly. I like using a wide bowl to avoid any lumps.
Step 3: Combine Wet Ingredients
In another bowl, mix the oil, eggs, and vanilla on medium-high speed until combined—you’ll notice the mixture looking smooth and glossy. Then add the buttermilk and mix until just combined. Using room-temperature eggs and buttermilk helps everything come together smoothly without curdling.
Step 4: Bring It All Together with Coffee
Pour the wet ingredients into the dry, then add the hot coffee. Use your mixer or a whisk on low speed to combine gently. The batter will be thinner than you expect—this is normal! It helps create the moist crumb that makes this cake so unforgettable.
Step 5: Bake, Cool, and Level
Divide the batter evenly between the pans and bake for about 23-26 minutes. Don’t skip the toothpick test: insert it near the center, and it should come out clean. When the cakes cool, they may sink slightly, which is totally normal with cocoa—the richness is worth this small quirk! Use a serrated knife to level the tops if they domed, so your layers stack beautifully.
Step 6: Make the Luscious Chocolate Buttercream
Beat softened butter on medium speed until creamy, then add powdered sugar, cocoa powder, cream, salt, and vanilla extract. Beat at low speed to combine, then high speed for a smooth finish without over-whipping. Adjust the consistency with more sugar or cream until your buttercream is silky but firm enough to spread easily—taste-testing is essential here!
Step 7: Assemble and Chill
Place one cake layer on your serving plate, spread a generous amount of frosting on top, then add the second layer. Frost the top and sides smoothly with a spatula and bench scraper. Sprinkle chocolate chips for a bit of fun texture if you like. Refrigerate the cake uncovered for about 30–60 minutes before slicing to help the frosting set—you’ll find it holds its shape better and slices cleanly.
Pro Tips for Making Moist Chocolate Layer Cake Recipe
- Room Temperature Ingredients: Bringing eggs and buttermilk to room temp really helps the batter come together smoothly and create a fluffy cake.
- Don’t Skip the Coffee: I discovered this trick years ago—it intensifies the chocolate without tasting like actual coffee and keeps the cake exceptionally moist.
- Use Fresh Cocoa Powder: Stale cocoa can weaken the flavor, so I always check the freshness date for the best results.
- Parchment Paper Magic: Cutting parchment rounds for your pans ensures easy cake removal and clean edges, avoiding frustrating tears.
How to Serve Moist Chocolate Layer Cake Recipe

Garnishes
I usually keep it classic with a handful of semi-sweet chocolate chips sprinkled on top—they add a nice bite and look adorable. Sometimes, adding a dusting of cocoa powder or a few fresh raspberries on top balances the sweetness and looks beautiful for special occasions.
Side Dishes
This cake pairs wonderfully with a scoop of vanilla ice cream or a dollop of lightly sweetened whipped cream. On warmer days, I love serving it alongside fresh berries or a simple fruit salad to lighten up the richness.
Creative Ways to Present
For birthdays or celebrations, I’ve decorated the cake with edible gold leaf and fresh flowers for an elegant look. Using colorful sprinkles or drizzling melted chocolate over the top makes it festive and fun, especially if kids are involved. Layering with fruit preserves between the cake and frosting adds a surprising burst of flavor that always impresses.
Make Ahead and Storage
Storing Leftovers
I tightly cover leftover cake with plastic wrap or place it in a cake carrier to keep it fresh. It stays moist and delicious for up to 5 days in the fridge—perfect for savoring over the week without any sacrifice in taste.
Freezing
You can freeze the unfrosted cake layers wrapped well in plastic wrap and foil for up to 3 months. When you’re ready to frost and serve, just thaw in the fridge overnight. I’ve found this method really convenient for prepping ahead of time.
Reheating
Leftover slices taste amazing at room temperature or slightly warmed. I pop slices in the microwave for about 10-15 seconds to revive that fresh-baked softness. Just be careful not to overheat or the frosting can get too melty.
FAQs
-
Can I use Dutch-process cocoa powder instead of natural cocoa?
Yes, you can substitute Dutch-process cocoa, but it may slightly affect the cake’s rise because it’s less acidic than natural cocoa. If you do, consider decreasing the baking powder slightly or adding a teaspoon of vinegar to maintain balance.
-
Is the espresso powder necessary?
Espresso powder is optional but highly recommended for enhancing the chocolate flavor without adding a coffee taste. If you don’t have it, you can leave it out—the cake will still be fantastic!
-
Why is my cake sinking in the middle?
It’s common with moist chocolate cakes because cocoa powder doesn’t provide as much structure as flour. Overmixing or opening the oven door too early can also cause sinking, so handle the batter gently and avoid interruptions while baking.
-
Can I make this cake gluten-free?
Absolutely! Use a high-quality gluten-free flour blend designed for cakes. I suggest adding a bit of xanthan gum if your blend doesn’t already include it to help with texture and structure.
Final Thoughts
This Moist Chocolate Layer Cake Recipe has become a staple for me because it’s simple, reliable, and irresistibly delicious. Every time I bake it, I’m reminded why chocolate cake is such a beloved classic—so rich, so tender, yet easy enough to make at home anytime. I can’t wait for you to try it and see just how amazing a homemade chocolate cake can be. Seriously, once you do, it might just become your go-to for every celebration, just like mine.
Print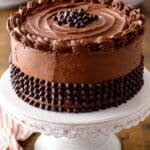
Moist Chocolate Layer Cake Recipe
- Prep Time: 30 minutes
- Cook Time: 26 minutes
- Total Time: 4 hours
- Yield: 12 servings 1x
- Category: Dessert
- Method: Baking
- Cuisine: American
- Diet: Vegetarian
Description
This Deliciously Moist Chocolate Layer Cake is a rich, decadent treat featuring a deeply chocolatey sponge paired with smooth and creamy chocolate buttercream. Perfectly balanced with coffee and cocoa, this cake offers a moist texture and intense flavor that melts in your mouth. Ideal for celebrations or anytime indulgence, it comes with simple instructions for baking, frosting, and assembling a two-layer cake that looks as good as it tastes.
Ingredients
Cake:
- 1 and 3/4 cups (219g) all-purpose flour (spooned & leveled)
- 3/4 cup (62g) unsweetened natural cocoa powder
- 1 and 3/4 cups (350g) granulated sugar
- 2 teaspoons baking soda
- 1 teaspoon baking powder
- 1 teaspoon salt
- 2 teaspoons espresso powder (optional)
- 1/2 cup (120ml) vegetable oil (or canola oil or melted coconut oil)
- 2 large eggs, at room temperature
- 2 teaspoons pure vanilla extract
- 1 cup (240ml) buttermilk, at room temperature
- 1 cup (240ml) freshly brewed strong hot coffee (regular or decaf)
Chocolate Buttercream:
- 1 and 1/4 cups (282g) unsalted butter, softened to room temperature
- 3 and 1/2 cups (420g) confectioners’ sugar
- 3/4 cup (62g) unsweetened cocoa powder (natural or dutch process)
- 3–5 tablespoons (45-75ml) heavy cream (or half-and-half or milk), at room temperature
- 1/4 teaspoon salt
- 1 teaspoon pure vanilla extract
- Optional for decoration: semi-sweet chocolate chips
Instructions
- Preheat and prepare pans: Preheat oven to 350°F (177°C). Grease two 9-inch cake pans, line with parchment paper rounds, then grease the parchment paper to ensure cakes release easily.
- Make the cake batter: In a large bowl, whisk together the flour, cocoa powder, sugar, baking soda, baking powder, salt, and optional espresso powder. In another bowl or mixer, blend the oil, eggs, and vanilla on medium-high speed until combined. Add the buttermilk and mix until integrated. Pour the wet ingredients into the dry, add the hot coffee, and whisk or beat on low speed until fully combined. The batter will be thin.
- Bake cakes: Divide batter evenly between the prepared pans. Bake for 26 minutes or until a toothpick inserted in the center comes out clean. Remove from oven and place on a wire rack to cool completely in the pans.
- Prepare the buttercream: Using a mixer with a paddle attachment, beat the butter on medium speed until creamy, about 2 minutes. Add confectioners’ sugar, cocoa powder, 3 tablespoons of cream, salt, and vanilla. Beat on low for 30 seconds, then on high for 1 minute. Adjust thickness by adding more sugar or cream as needed. Taste and add another pinch of salt if desired.
- Assemble and frost: Level the cooled cake layers by trimming off domed tops with a serrated knife. Place one cake layer on a serving plate, spread frosting evenly on top. Add the second layer and cover the cake entirely with remaining frosting. Smooth with an icing spatula and bench scraper. Decorate with chocolate chips if using.
- Chill before serving: Refrigerate the uncovered assembled cake for 30 to 60 minutes to allow the frosting to set. Serve chilled or at room temperature.
- Store leftovers: Cover leftover cake tightly and store in the refrigerator for up to 5 days. Use a cake carrier for easy transport and freshness.
Notes
- Use parchment paper rounds in cake pans to prevent sticking and ensure smooth cake removal.
- Espresso powder is optional but enhances the chocolate flavor significantly.
- Adjust the buttercream consistency by adding more powdered sugar if too thin or more cream if too thick.
- Room temperature ingredients help achieve a smoother batter and frosting.
- Leveling cakes creates a flat surface for better frosting application and an even cake stack.
- Refrigerating the cake before slicing helps maintain its shape and makes cutting easier.
- This recipe can be adapted using different oils such as canola or melted coconut oil.
- For a richer flavor, use Dutch-processed cocoa powder in both cake and frosting.
- Use a mixer for best results but a whisk and manual effort can also work.