

There’s just something about that sweet, tangy, and smoky flavor of the traditional Huli Huli Chicken Recipe that instantly transports me to Hawaii’s sunny shores. This grilled chicken with its pineapple-infused marinade is not only packed with flavor but also surprisingly simple to make at home. Let me walk you through exactly how to get that perfect golden, juicy chicken every time!

Why You’ll Love This Recipe
- Flavor Explosion: The pineapple brine creates irresistibly juicy chicken infused with a perfect balance of sweet and savory.
- Classic Hawaiian Taste: This recipe brings an authentic island flavor to your backyard grill without needing fancy ingredients.
- Versatile Cooking Methods: Whether grilled, smoked, or oven-roasted, you can enjoy this dish in multiple delicious ways.
- Perfect for Gatherings: It’s a crowd-pleaser that makes any meal feel like a special occasion.
Ingredients You’ll Need
The magic of this Huli Huli Chicken Recipe lies in the simple combination of sweetness from pineapple juice, a touch of brown sugar, and a hint of savory soy flavors. Each ingredient plays its part to make the chicken tender and packed with taste.

- Whole chicken: Spatchcocked for even grilling—makes all the difference in juicy results.
- Pineapple juice: I use canned or jarred—not fresh—as its consistent sweetness is key for the brine.
- Dark brown sugar: Adds deep molasses flavor, but regular brown sugar works fine in a pinch.
- Ketchup (optional): I include it sometimes for a richer color on the chicken skin.
- Kosher salt and ground black pepper: Essential to season and bring out the flavors.
- Mom’s Huli Huli Sauce ingredients: Pineapple juice, brown sugar, shoyu/soy sauce, ketchup, cornstarch, garlic powder, cayenne pepper, and seasonings all come together to create that classic finish.
Variations
One of my favorite things about this Huli Huli Chicken Recipe is how flexible it is. Whether you want to swap chicken parts or adjust heat levels, it’s easy to personalize to your family’s tastes or dietary needs.
- Using different cuts: I’ve made this with thighs, drumsticks, and even wings—each brings its own delicious texture and cooks up beautifully on the grill.
- Oven Roasting: On rainy days, I skip the grill and roast the chicken in the oven, basting often for that same gorgeous caramelized finish.
- Spice it up: Adding a bit more cayenne pepper or chili flakes gives the sauce a nice kick if you like things spicy.
- Gluten-free tweak: Substitute tamari for soy sauce to keep it gluten-free without losing the classic flavor.
How to Make Huli Huli Chicken Recipe

Step 1: Spatchcock and Prepare Your Chicken
I used to avoid spatchcocking because it seemed intimidating, but once I tried it, it was a game-changer. Just remove the backbone of the chicken with sharp kitchen shears and press down the breastbone to flatten it. This ensures the chicken cooks evenly and faster — no more undercooked thick parts or dry edges! I like to halve it for easier handling and tuck wing tips under to prevent burning. Don’t forget to pat the chicken dry before you start so the skin crisps up nicely on the grill.
Step 2: Brine in Pineapple Juice
This brine is the trick that really took my huli huli chicken to the next level. Whisk together pineapple juice, brown sugar, ketchup, and kosher salt, then cover the chicken and refrigerate for at least 12 hours. I’ve found that overnight is perfect — it’s enough time for the flavors to soak in and the chicken to become incredibly tender. Don’t skip this step; it’s worth the wait!
Step 3: Prepare the Grill and Huli Huli Sauce
About an hour before grilling, pull your chicken out of the fridge to come to room temp — this helps it cook evenly. Set up your grill with direct and indirect heat zones. Meanwhile, I like to make the Huli Huli sauce on the stove: blend pineapple juice, brown sugar, soy sauce, ketchup, cornstarch, garlic powder, and a pinch of cayenne in a saucepan, simmering until thickened. This sauce is the sweet and tangy star that’ll coat your chicken once it’s off the heat.
Step 4: Grill the Chicken with Care
Start by placing your halved chicken on the grill’s indirect heat side, skin side up, close enough to catch that smoky flavor but not direct flames. Close the lid and cook low and slow, turning 180 degrees every 15 minutes. Each time you rotate, take your basting brush and slather on the reserved pineapple brine from the fridge — this keeps things moist and builds layers of flavor. I always use a meat thermometer to check doneness — when the thickest part hits 160°F, it’s almost time to rest.
Step 5: Rest and Serve with Sauce
Once off the grill, let your chicken rest for 5-10 minutes. This hold time finishes cooking gently from residual heat and locks in juices. The internal temp should reach 165°F by now. Carve it up, generously coat it with that luscious Huli Huli sauce, and get ready to dig in. I recommend serving it Hawaiian plate lunch style with fluffy steamed rice and maybe a scoop of creamy mac salad — talk about comfort on a plate!
Pro Tips for Making Huli Huli Chicken Recipe
- Don’t Rush the Brine: Overnight brining transforms texture and flavor, so plan ahead and let the chicken soak up that juice!
- Use a Meat Thermometer: Avoid guesswork; check the thickest part for perfect doneness and juicy results every time.
- Indirect Grilling for Even Cooking: Setting up your grill with two zones prevents flare-ups and ensures the chicken cooks through without burning.
- Baste Frequently: That pineapple brine keeps the chicken moist and builds layers of sticky, caramelized flavor—don’t skimp on it!
How to Serve Huli Huli Chicken Recipe

Garnishes
Whenever I serve Huli Huli chicken, I love topping it with a sprinkle of finely chopped green onions and a few toasted sesame seeds. It adds a fresh crunch and a nutty note that beautifully complements the sweet glaze. Sometimes, a wedge of lime on the side brightens everything up, especially if you want a little tang to cut the richness.
Side Dishes
I usually pair this chicken with fluffy steamed white rice and Mom’s Hawaiian mac salad—as traditional as it gets! But I also love serving it alongside grilled corn on the cob, a simple cucumber salad, and sometimes even roasted sweet potatoes for a heartier meal. You’ll find the tropical flavors marry nicely with just about anything light and fresh.
Creative Ways to Present
For special occasions, I like to serve the chicken family-style on a big platter over a bed of fresh pineapple slices and shredded cabbage, garnished with colorful edible flowers for that island party vibe. It makes a stunning presentation and sets the perfect mood for a relaxed Hawaiian-inspired feast.
Make Ahead and Storage
Storing Leftovers
Leftover Huli Huli chicken keeps well in an airtight container in the fridge for up to 4 days. I always make sure to pat the chicken dry before storing to prevent sogginess. Having this on hand makes for quick, flavorful lunches or dinners throughout the week.
Freezing
I’ve frozen leftovers successfully by wrapping pieces tightly in foil and placing them in a freezer-safe bag or container. When you’re ready to enjoy, thaw overnight in the fridge for best texture. While freezing might soften the crust a bit, reheating with a quick broil brings back some of that crispness.
Reheating
To reheat, I prefer the oven or a toaster oven at about 350°F for 10–15 minutes to keep the skin crispy. If you’re in a hurry, the microwave works too—just sprinkle a little water on the chicken and cover to maintain moisture. Then finish with a quick sear in a hot pan if you miss that grill char.
FAQs
-
Can I use fresh pineapple juice instead of canned for the brine?
While fresh pineapple juice sounds ideal, I find canned or jarred pineapple juice gives a more consistent sweetness and acidity, which helps achieve that classic Huli Huli flavor and tenderizes the chicken evenly.
-
What if I don’t have a grill—can I make Huli Huli Chicken indoors?
Definitely! Oven-roasting the chicken at 425°F on a rack inside a skillet or braiser, basting often with the reserved brine, is a fantastic alternative. It yields tender, flavorful chicken with a nicely caramelized skin.
-
How long should I brine the chicken for?
A minimum of 12 hours is best to let the chicken fully soak up the flavors and stay juicy while grilling. I usually do it overnight but not much longer than 48 hours to avoid overly salty meat.
-
Can I use chicken pieces instead of a whole chicken?
Absolutely! Chicken thighs, drumsticks, or breasts all work wonderfully. Just adjust your cooking time accordingly and keep using the same brine and sauce to get that classic Huli Huli taste.
-
What’s the best way to avoid burning the chicken on the grill?
Set up your grill for indirect cooking — one side with direct heat and the other indirect — and cook your chicken on the indirect side. Baste regularly and rotate every 15 minutes to prevent flare-ups and burning.
Final Thoughts
This Huli Huli Chicken Recipe is one of my go-to dishes when I want that perfect balance of sweet, smoky, and savory flavors without fuss. The brine trick and spatchcock method are secrets that have transformed my grilling game—and I’m sure you’ll love how juicy and delicious this chicken turns out. Gather your friends, fire up the grill, and bring some island vibes to your next meal. Trust me, once you try this, it’ll become a regular in your recipe rotation!
Print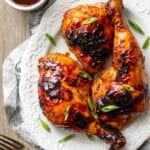
Huli Huli Chicken Recipe
- Prep Time: 25 minutes
- Cook Time: 60 minutes
- Total Time: 13 hours 25 minutes
- Yield: 5 servings 1x
- Category: Main Course
- Method: Grilling
- Cuisine: Hawaiian
Description
Experience the authentic taste of Hawai’i at home with this Grilled Huli Huli Chicken recipe. Featuring a juicy whole chicken marinated in a sweet and tangy pineapple brine, then grilled to perfection and basted with flavorful Huli Huli sauce. Perfect for a family meal served with rice and Hawaiian mac salad.
Ingredients
Chicken and Brine
- 1 whole 4-5 pound chicken, spatchcocked and halved
- 3 cups canned or jarred pineapple juice
- 1/3 cup dark brown sugar
- 1 tablespoon ketchup (optional, for color)
- 2 tablespoons kosher salt (for brine)
- Kosher salt, to season
- Ground black pepper, to season
Mom’s Huli Huli Sauce
- 1 cup pineapple juice
- 1/4 cup dark brown sugar
- 2 teaspoons shoyu or soy sauce
- 1 tablespoon ketchup
- 1/2 teaspoon cornstarch
- 1/2 teaspoon garlic powder
- Pinch of cayenne pepper
- 1/2 teaspoon kosher salt
- Ground black pepper, to taste
Instructions
- Spatchcock and Halve the Chicken: Pat the chicken dry with paper towels. Place breast-side down on a cutting board. Using sharp kitchen shears, cut along each side of the backbone to remove it. Flip breast-side down, press down firmly on the breastbone to crack it, then flip the chicken flat with breast-side up. Slice between the breasts to create two halves. Tuck wing tips behind the breasts to prevent burning.
- Brine the Chicken: In a large bowl, whisk together pineapple juice, brown sugar, ketchup (if using), and 2 tablespoons kosher salt until dissolved. Reserve 1 cup of this brine for basting later. Submerge the chicken halves in the remaining brine. Cover and refrigerate for at least 12 hours and up to 48 hours.
- Prepare Grill and Bring Chicken to Room Temperature: At least 60 minutes before grilling, remove chicken from refrigerator and discard excess brine. Pat chicken dry thoroughly. Preheat your grill for indirect cooking, establishing zones of direct high heat and indirect heat. For gas grills, preheat for 15 minutes; for charcoal, light coals 30 minutes before grilling.
- Prepare Huli Huli Sauce: In a small saucepan over medium-high heat, combine all sauce ingredients including pineapple juice, brown sugar, shoyu, ketchup, cornstarch, garlic powder, cayenne, salt, and pepper. Whisk to combine. Bring to a boil, then reduce heat and simmer for 20 minutes, stirring occasionally until thickened. Remove from heat and set aside.
- Grill the Chicken: Place chicken halves breast-side up on the indirect heat side of the grill, close to direct heat but not over it. Close grill lid and cook for up to 60 minutes, rotating the chicken 180 degrees every 15 minutes. Each time you rotate, baste generously with the reserved pineapple brine using a pastry brush. Cook until the internal temperature in the thickest part of the breast reaches 160 degrees Fahrenheit.
- Rest the Chicken: Remove chicken from grill and transfer to a serving plate. Let rest uncovered for 5-10 minutes; carryover heat will raise the temperature to 165 degrees Fahrenheit, ensuring it is fully cooked and juicy.
- Serve: Carve chicken as desired. Serve immediately with generous amounts of huli huli sauce and your choice of sides like white rice and Hawaiian macaroni salad for an authentic plate lunch experience.
Notes
- Store leftover grilled huli huli chicken in an airtight container in the refrigerator for up to 4 days. Reheat gently in the microwave.
- Save the chicken carcass after eating to make homemade chicken stock or broth.
- Alternative cuts like bone-in chicken parts, boneless skinless breasts, or wings can be used with adjusted grilling times.
- Oven roasting option: Roast at 425 degrees Fahrenheit for 1 hour to 1 hour 10 minutes, rotating and basting every 20 minutes.
- Smoking option: Smoke at 350 degrees Fahrenheit for 35-40 minutes, basting every 15 minutes.
- Prep huli huli sauce up to one week in advance and store refrigerated.
- Spatchcock and brine chicken up to two days in advance for convenience.


