There’s something truly magical about light, fluffy cake paired with soft pastel colors and a fun, festive finish. The Easter Cake with Blue Buttercream and Coconut Nest Recipe is just that—a dazzling treat that looks as beautiful as it tastes, making it perfect for your holiday celebration or any springtime gathering.

Why You’ll Love This Recipe
- Visually Stunning: The pastel blue buttercream and coconut nest create a stunning centerpiece that’s sure to impress your guests.
- Delicious Texture: Soft vanilla layers combined with fluffy buttercream and toasted coconut provide a perfect balance of flavors and textures.
- Easy to Customize: You can tailor the colors, cake flavors, and decorations to fit your style or dietary preferences.
- Family Favorite: This cake has won over my family and friends every Easter—and it will yours too!
Ingredients You’ll Need
The ingredients for this Easter cake blend classic flavors with beautiful pops of color and texture. Using quality butter and fresh coconut will really elevate your final dessert.

- Vanilla Cake: A three-layer vanilla cake works perfectly—choose your favorite recipe or even a store-bought cake for convenience.
- Unsalted Butter: Softened to the right temperature to whip into that velvety buttercream—don’t over-soften to avoid a sloppy frosting.
- Icing Sugar (Powdered Sugar): Sifted for smoothness—it’s key to achieving a silky buttercream texture.
- Vanilla Extract: Adds warm depth to the frosting, complementing the sweet coconut and cake flavors.
- Blue Gel Food Coloring: Just a drop or two for that perfect pastel shade without risking overpowering the frosting.
- Salt: A pinch to balance the sweetness in the buttercream.
- Cocoa Powder: For creating delicate speckles on the frosting—a fun decorative touch.
- Coconut Flakes: Toasted golden to give the nest that irresistible crunch and nutty aroma.
- Small Easter Eggs: Speckled pastel candies look adorable nestled in the coconut.
Variations
One of my favorite things about this Easter Cake with Blue Buttercream and Coconut Nest Recipe is how easy it is to customize it. Whether you want a different flavor or need to swap for a dietary preference, you can make it your own and still wow everyone.
- Chocolate Variation: Once, I replaced one layer with chocolate cake for a twist—my family couldn’t get enough of the flavor contrast!
- Vegan or Dairy-Free: Use dairy-free butter and icing sugar alternative; the coconut nest still shines and adds texture.
- Color Play: Try pastel pink or lavender instead of blue for a fresh spin on the classic look.
- Nut-Free Option: Swap coconut with toasted rice cereal or crushed meringue to keep that “nest” feel without allergens.
How to Make Easter Cake with Blue Buttercream and Coconut Nest Recipe

Step 1: Prep and Level Your Cake Layers
Start by trimming the tops of your cake layers if needed—this makes stacking neat and stable. I like to chill the layers in the fridge for at least 30 minutes before frosting. It really helps prevent crumbs from ruining the smooth look of your buttercream when you spread it later.
Step 2: Toast the Coconut for the Nest
Preheat your oven to 160°C (325°F). Spread coconut flakes on a baking sheet and toast for about 6 to 10 minutes, stirring every few minutes to get even color. Keep a close eye so it turns golden but doesn’t burn—trust me, the aroma will fill your kitchen with pure heaven. Let it cool completely before decorating.
Step 3: Whip Up the Blue Buttercream
In a stand mixer, beat the softened butter on a high speed for about 3 minutes until it lightens from yellow to almost white—that aeration is key to that soft, pastel effect. Gradually add sifted icing sugar in three batches, starting slow and increasing speed to avoid a powdered sugar cloud in your kitchen. Mix in vanilla and salt, then beat it well until fluffy.
For the pastel blue color, remove about a tablespoon of frosting into a bowl, add one drop of blue gel food coloring, and mix well. Then add a teaspoon of this colored frosting back to the main bowl and beat again. Repeat until you reach the perfect shade. This little trick gives you more control than coloring the whole batch at once.
Step 4: Layer, Frost, and Speckle
Spread about three-quarters of a cup of frosting between each cake layer for a luscious middle. Use the rest to cover the sides and top, smoothing it carefully. I usually have a bit leftover, which is great—you can freeze it for another treat later.
Make your cocoa speckle mixture by stirring 1 tablespoon of cocoa powder into 3 tablespoons of boiling water. Grab a toothbrush, dip it into the cocoa mix, and flick the bristles toward the cake to create delicate speckles. Pro tip: angle the toothbrush at about 45 degrees away from the cake surface to avoid big drips. Practice a few flicks in the sink first; it makes the process more fun and less messy.
Step 5: Create the Coconut Nest and Decorate
Pile the toasted coconut in a nest shape right in the center of the cake and mound your pastel Easter eggs inside. Don’t forget to add a ring of coconut around the base with occasional eggs for extra flair. This little touch makes the cake feel festive and oh-so-inviting.
Pro Tips for Making Easter Cake with Blue Buttercream and Coconut Nest Recipe
- Butter Temperature Matters: Keep your butter around 18°C (64°F) before beating—it’s cool enough to whip well but soft enough to blend smoothly.
- Controlled Coloring: Adding food coloring bit by bit to small amounts of frosting helps avoid surprises in your final shade.
- Coconut Toasting Vigilance: Stay close while toasting coconut; it can go from golden to burnt quickly but the nutty aroma will warn you first.
- Speckling Technique: Always flick cocoa speckles away from the cake first to get comfortable—nothing’s worse than an accidental big blob on your masterpiece!
How to Serve Easter Cake with Blue Buttercream and Coconut Nest Recipe

Garnishes
I love keeping the garnishes simple yet joyful. The toasted coconut nest with pastel candy eggs really steals the show, but sometimes I add a few fresh edible flowers or a light dusting of powdered sugar for an extra spring-y vibe. It’s all about balance—let the colors pop without overwhelming the look.
Side Dishes
This cake pairs beautifully with light sides like fresh berries or a citrus salad to cut through the richness. A mild herbal tea or sparkling lemonade also works wonders alongside to refresh your palate.
Creative Ways to Present
One Easter, I served this cake on a rustic wooden cake stand surrounded by real moss and spring blossoms to enhance the “nest” theme—it was a hit! You can also cut into neat slices and plate with extra toasted coconut or a drizzle of raspberry sauce for an elegant touch.
Make Ahead and Storage
Storing Leftovers
Your Easter Cake with Blue Buttercream and Coconut Nest Recipe keeps well covered in the fridge for up to 4 days. I usually store leftovers in an airtight cake container to maintain the buttercream’s silky texture and prevent the coconut from getting stale.
Freezing
I’ve successfully frozen leftover cake slices wrapped tightly in plastic and foil, then placed in freezer bags. The buttercream maintains its flavor and texture after thawing overnight in the fridge, making this ideal for prepping ahead or preserving extras.
Reheating
Since this is a buttercream-frosted cake, I recommend serving it chilled or at room temperature. If you want to warm a slice slightly, remove frosting areas and heat gently in the microwave for 10 seconds, then add frosting back on top before enjoying.
FAQs
-
Can I use a different color for the buttercream besides blue?
Absolutely! You can swap the blue gel food coloring for any pastel color you like. Just use the same coloring technique—mix a small amount into a spoonful of frosting first, then gradually add back to control the shade. Lavender, pink, or even mint green all make gorgeous alternatives.
-
How do I prevent the buttercream from turning green when I add blue coloring?
This happens because butter is naturally yellow, and when combined with blue, it can lean green. To minimize this, beat your butter longer until it’s lighter in color and aerated before adding color. European-style butters tend to be whiter and work well. Also, add coloring gradually—you might find the slight green tint charming!
-
Can I make the coconut nest ahead of time?
Yes! Toast the coconut up to a day in advance and store it in an airtight container at room temperature. Assemble the nest on the cake right before serving so the coconut stays crisp and fresh.
-
What brand of blue gel coloring do you recommend?
I personally prefer a navy blue gel food coloring for its rich pigment that’s easier to control for pastel hues. Brands like AmeriColor or Wilton work well. Remember: a little goes a long way!
Final Thoughts
Making the Easter Cake with Blue Buttercream and Coconut Nest Recipe has become one of my favorite holiday rituals—there’s something so satisfying about crafting a cake that looks as joyful as the season itself. I hope you’ll find the same delight in decorating and sharing it as your family digs in. Trust me, once you try this recipe, it will be your go-to centerpiece for years to come!
Print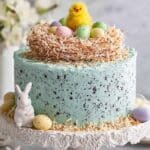
Easter Cake with Blue Buttercream and Coconut Nest Recipe
- Prep Time: 45 minutes
- Cook Time: 30 minutes
- Total Time: 1 hour 15 minutes
- Yield: 12 servings 1x
- Category: Dessert
- Method: Baking
- Cuisine: Western
- Diet: Vegetarian
Description
A beautifully decorated Easter Cake featuring three layers of vanilla cake with a pastel blue vanilla buttercream frosting, speckled cocoa decorations, toasted coconut flakes forming a nest, and topped with pastel-colored Easter eggs. Perfect for festive celebrations, this cake combines classic flavors with elegant presentation.
Ingredients
Cake
- 1 Vanilla Cake, 3 layers (20cm/8″ cake of choice)
Pastel Blue Vanilla Buttercream
- 340g unsalted butter, 1.25cm / ½” cubes, softened to 18°C/64°F
- 750g soft icing sugar, sifted
- 3 tsp vanilla extract
- 1 – 2 drops blue gel food colouring
- 1/8 tsp salt
Frosting Speckles
- 1 tbsp cocoa powder (unsweetened or sweetened)
- 3 tbsp boiling water
- Toothbrush (or basting brush)
Decorating
- 2 cups coconut flakes (or shaved)
- 200g small Easter eggs, pastel coloured speckled
Instructions
- Trim Cake Layers: Level the tops of the cake layers if desired to ensure an even stacking surface and better appearance.
- Chill Cake Layers: Place the cake layers in the refrigerator until thoroughly chilled. This helps prevent crumbs from mixing into the frosting during assembly.
- Toast Coconut: Preheat oven to 160°C/325°F (140°C fan). Spread coconut flakes evenly on a baking tray, bake for 10 minutes, stirring every couple of minutes until golden brown. Remove from oven and let cool completely.
- Prepare Buttercream Frosting – Cream Butter: Beat the softened butter in a stand mixer on speed 8 for 3 minutes until it changes from yellow to almost white due to aeration.
- Add Icing Sugar: Add the sifted icing sugar in three batches. Begin mixing on speed 1 to partially incorporate, then gradually increase speed until mostly mixed in.
- Add Vanilla and Salt: Mix in vanilla extract and salt, then beat on speed 8 for 2 minutes until the frosting is fluffy and nearly white in color.
- Color Buttercream: Remove 1 tablespoon of frosting into a small bowl and add 1 drop of blue gel food coloring. Mix well, then return 1 tablespoon of the colored frosting back into the main frosting. Beat until evenly incorporated. Repeat adding more colored frosting 1 teaspoon at a time until the desired pastel blue tone is achieved, scraping down the sides as necessary.
- Make Speckle Mixture: Mix cocoa powder and boiling water to form a speckle liquid for decorating.
- Assemble Cake: Spread ¾ cup of the frosting evenly between each of the three cake layers. Then, use the remaining frosting to cover the sides and top of the cake. Reserve about ½ cup frosting as extra.
- Decorate Cake with Speckles: Place a board behind the cake to catch splatters. Dip a toothbrush into the cocoa speckle mixture and use your fingers to flick speckles onto the cake’s top and sides. Angle the toothbrush 45 degrees downward when flicking over the top to avoid large drips.
- Create Coconut Nest: Pile toasted coconut in the center of the top of the cake to form a nest shape.
- Add Easter Eggs: Place a mound of small pastel colored speckled Easter eggs inside the coconut nest on top and dot around the base of the cake with more coconut and eggs.
- Serve and Enjoy: Proudly bring the cake to the table and enjoy the compliments from your guests.
Notes
- You can use any preferred cake recipe; this recipe uses a 3-layer vanilla cake.
- This buttercream recipe is for a 3-layer cake; for a 2-layer cake reduce icing sugar to 500g accordingly.
- Butter should be softened but still cool to achieve the right texture and color when beaten.
- Gradual addition of blue gel food coloring helps achieve a pastel blue without oversaturation or green tint.
- European butters with lighter color enhance the pastel blue frosting better than yellow butters.
- Small pastel colored speckled Easter eggs work best for decoration but any similar eggs can be used.
- Store the finished cake refrigerated for up to 4 days depending on the cake used.
- Freeze any leftover frosting for up to 3 months for future use.