There’s something truly irresistible about a rich, melt-in-your-mouth dessert that feels elegant yet simple to make. This Decadent Flourless Chocolate Cake Recipe perfectly fits the bill—it’s intense, fudgy, and so easy to whip together that you’ll want to make it again and again.

Why You’ll Love This Recipe
- Ultra-Fudgy Texture: The cake’s flourless nature lets the chocolate shine with a dense, velvety crumb that’s utterly decadent.
- Simple Ingredients: Just eggs, chocolate, and butter come together with no flour fuss, making it approachable even for baking newbies.
- Perfect for Any Occasion: Whether it’s a dinner party or a quiet night in, this cake serves beautifully and always wows guests.
- Flexible Serving Options: Top it with ganache, berries, or powdered sugar—you can make it as fancy or as laid-back as you want.
Ingredients You’ll Need
The magic of this cake lies in the quality of its simple ingredients—chocolate and eggs, mainly. Pick the best chocolate you can find because it dramatically impacts flavor and texture.

- Eggs: Make sure they’re cold; cold eggs whip up better, giving the cake the lift it needs without flour.
- Semi-sweet chocolate: Choose a good-quality bar or chips, ideally with around 60% cocoa for richness without too much bitterness.
- Unsalted butter: Cubed and softened for smooth melting—unsalted lets you control the salt level better.
- Heavy whipping cream: For the luscious ganache topping that makes the cake extra glossy and indulgent.
- Raspberries or raspberry sauce (optional): Fresh fruit adds a delightful tart contrast to the sweet, dense cake.
- Powdered sugar (optional): A light dusting is simple but pretty for finishing touches.
Variations
I love how easy it is to tweak this Decadent Flourless Chocolate Cake Recipe to fit different tastes or dietary needs. Customize away—you might be surprised at how a little change can transform the whole experience!
- Nutty Twist: I sometimes fold in toasted chopped walnuts or pecans for an added crunch that cuts through the richness beautifully.
- Dairy-Free Version: Swap butter for coconut oil and use dairy-free chocolate to keep it vegan-friendly without losing texture.
- Spiced Flair: Adding a pinch of espresso powder or cinnamon to the chocolate mixture gives the cake a subtle complexity I adore.
- Fruit Enhancements: Swirl in some raspberry preserves before baking or top with fresh berries to add brightness and color.
How to Make Decadent Flourless Chocolate Cake Recipe

Step 1: Whip the Eggs to Heavenly Volume
Start by preheating your oven to 325°F and prepping a 9-inch springform pan with parchment and grease. The real secret to this cake’s airy lift is whipping your cold eggs at high speed until they’ve doubled in volume—about 5 minutes. I love watching the eggs transform from liquid to fluffy clouds. This step is crucial to avoid a dense, heavy cake.
Step 2: Melt Chocolate and Butter Gently
While your eggs get fluffy, melt the coarsely chopped semi-sweet chocolate and cubed butter together. I usually use a double boiler, but the microwave works fine too—just go in 30-second bursts, stirring gently. The key is to avoid overheating, which can seize the chocolate and ruin the smooth texture.
Step 3: Fold Eggs into Chocolate in Batches
Here’s the part where patience pays off. Fold your whipped eggs into the chocolate mixture gently but thoroughly, adding them in three portions. This gradual step keeps the batter light and airy instead of deflating your hard work. Use a spatula and fold from the bottom up, giving it several slow turns with each addition.
Step 4: Bake in a Water Bath for Even Cooking
Pour your luscious batter into the prepared pan, smoothing the top. Then place it inside a larger pan filled halfway with boiling water for a gentle water bath bake. This technique ensures the cake cooks evenly without drying out the edges. Bake for about 18-20 minutes until the cake’s edges begin to set, top forms a thin crust, and the center registers 140°F on a thermometer. The slight wobble in the middle is perfect—it sets as it cools.
Step 5: Cool and Chill to Firm Up
Remove the cake from the water bath and cool it on a wire rack to room temperature. At this point, the center is still soft, which I actually love. Then pop it in the fridge until totally firm. This chilling step deepens the flavor and gives you that rich, sliceable texture everyone raves about.
Step 6: Make a Decadent Ganache Topping
For the finishing touch, melt your ganache ingredients by heating heavy cream until it just starts to boil, then pour over chopped chocolate. Let it sit for a few minutes, then whisk till glossy and smooth. Spread over your cooled cake for an elegant, shiny finish. I like to sprinkle fresh raspberries and a dusting of powdered sugar on top for a pop of color and tart contrast.
Pro Tips for Making Decadent Flourless Chocolate Cake Recipe
- Cold Eggs for Volume: I discovered that cold eggs whip better, giving the cake its light texture despite being flourless.
- Water Bath Magic: Baking in a water bath prevents cracks and gives the cake a silky crust instead of a dry surface.
- Gentle Folding: Folding the eggs slowly in batches keeps your batter airy and prevents deflation.
- Don’t Overbake: The center will look a bit underdone at 140°F, but the cake sets as it cools, so avoid baking longer to keep it fudgy.
How to Serve Decadent Flourless Chocolate Cake Recipe

Garnishes
I usually stick to fresh raspberries and a light dusting of powdered sugar—it’s classic and super pretty. Sometimes I add a spoonful of raspberry sauce on the side like a little jewel, but honestly, the ganache topping steals the show every time.
Side Dishes
This cake pairs wonderfully with a simple scoop of vanilla bean ice cream or a dollop of lightly sweetened whipped cream. I’ve also enjoyed it next to a fresh berry salad for some brightness to balance the richness.
Creative Ways to Present
For special occasions, I’ve inverted the cake onto a pretty platter and arranged edible flowers and fresh mint leaves around it. You can also slice it into small bite-sized squares and serve on a dessert platter with mini forks—that always makes a charming party dessert!
Make Ahead and Storage
Storing Leftovers
I keep leftover slices in an airtight container in the fridge—this cake stays moist and rich for up to 4 days. Just remember to pull it out a few minutes before serving so it can soften slightly for that melt-in-your-mouth experience.
Freezing
Freezing works great for this cake! I tightly wrap slices or the whole cake in plastic wrap and pop them in a sealed container. It freezes beautifully for up to 3 months without losing texture or flavor.
Reheating
When I’m ready to enjoy frozen leftovers, I thaw them overnight in the fridge, then let them sit at room temperature for 10-15 minutes before serving. If you want the ganache glossy again, a quick 5-10 second zap in the microwave helps without melting the cake.
FAQs
-
Can I use different types of chocolate in this Decadent Flourless Chocolate Cake Recipe?
Yes! Semi-sweet chocolate is traditional for balance between sweetness and bitterness, but you can experiment with dark or milk chocolate depending on your preference. Just aim for good-quality chocolate with at least 55% cocoa for rich flavor and texture.
-
Why does this cake need to be baked in a water bath?
Baking in a water bath provides gentle, even heat and moisture, which prevents cracks and helps the cake set with a smooth texture. Without it, the flourless cake can overcook on edges and dry out.
-
Can I make this Decadent Flourless Chocolate Cake Recipe gluten-free?
Absolutely! Since this recipe contains no flour, it’s naturally gluten-free. Just be sure your chocolate and other ingredients are certified gluten-free if you have severe allergies.
-
How do I know when the cake is done baking?
Look for a thin crust on top and edges just beginning to set, with the center still slightly jiggly. An instant-read thermometer should register about 140°F. It’s okay if it seems underbaked—the cake firms up as it cools.
Final Thoughts
This Decadent Flourless Chocolate Cake Recipe holds a special place in my heart because it captures pure chocolate bliss without complicated steps or fancy ingredients. I love sharing it with friends and watching their eyes light up after a bite. Give it a try—you’ll find it’s an elegant, foolproof dessert that feels like a real treat every time.
Print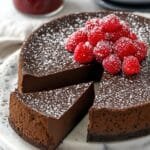
Decadent Flourless Chocolate Cake Recipe
- Prep Time: 25 minutes
- Cook Time: 20 minutes
- Total Time: 45 minutes
- Yield: 14 servings 1x
- Category: Dessert
- Method: Baking
- Cuisine: American
- Diet: Gluten Free
Description
This Flourless Chocolate Cake is a rich, decadent dessert made without flour, relying on eggs and chocolate for structure and flavor. It features a moist, slightly fudgy texture with a thin, set crust, topped with a smooth chocolate ganache and optional raspberries and powdered sugar for an elegant finish.
Ingredients
For the Flourless Chocolate Cake:
- 8 large eggs, cold
- 16 oz semi-sweet chocolate, coarsely chopped
- 1 cup unsalted butter, cubed
For the Chocolate Ganache:
- 4 oz semi-sweet chocolate, coarsely chopped
- 6 tbsp heavy whipping cream
Optional Toppings:
- Raspberry Sauce
- Raspberries
- Powdered sugar, for dusting
Instructions
- Preheat and prepare pan: Preheat the oven to 325°F. Line the bottom of a 9-inch springform pan with parchment paper and grease the sides. Prepare a water bath by boiling water in a kettle or pot.
- Whip eggs: Add the 8 cold eggs into a large mixing bowl and whip with a whisk attachment on high speed until the volume doubles, about 5 minutes.
- Melt chocolate and butter: Melt the 16 oz semi-sweet chocolate and 1 cup cubed butter together using a double boiler or microwave, stirring until smooth.
- Fold egg mixture into chocolate: Fold the whipped eggs into the chocolate mixture in three portions, mixing gently until fully combined after each addition.
- Prepare water bath for baking: Pour the batter into the prepared springform pan and spread evenly. Place this pan inside a larger pan, then fill the larger pan with boiling water until it reaches halfway up the sides of the springform pan.
- Bake the cake: Bake for about 20 minutes until the edges begin to set, a thin crust forms on top, and an instant-read thermometer in the center reads 140°F. The cake may look slightly under-baked but will firm as it cools.
- Cool and chill cake: Remove the springform pan from the water bath and cool on a wire rack to room temperature, then refrigerate until fully cold and firm.
- Unmold the cake: Remove the sides of the pan, invert the cake onto parchment paper, peel off the bottom parchment, then invert again onto a serving platter.
- Make the ganache: Place 4 oz chopped semi-sweet chocolate in a heatproof bowl. Microwave 6 tbsp heavy whipping cream until just boiling, pour over the chocolate, and let sit for 2-3 minutes. Whisk until smooth.
- Finish and serve: Spread the ganache evenly over the cooled cake. Optionally top with raspberries and dust with powdered sugar. Serve with raspberry sauce if desired.
Notes
- Makes 12-14 slices.
- Refrigerate the cake in an airtight container for up to 4 days.
- To freeze, wrap whole cake or individual slices tightly in plastic wrap, place in an airtight container, and freeze for up to 3 months. Thaw in the fridge before serving.
- Using a water bath helps ensure even baking and prevents cracking.
- The cake may appear slightly undercooked when removed from the oven but will set while cooling.
- You can use a double boiler or microwave carefully to melt chocolate and butter without burning.
- Cold eggs help achieve better volume when whipped.