

There’s something incredibly fun about biting into crunchy Cheeseburger Spring Rolls that stay juicy and flavorful inside. This Cheeseburger Spring Rolls Recipe takes the classic burger in a fresh, unexpected direction that’s perfect for game day, parties, or just shaking up dinner.

Why You’ll Love This Recipe
- Familiar Flavors with a Twist: You get all the cheeseburger yumminess wrapped up in crispy spring rolls.
- Perfect Party Snack: These rolls are super shareable and always a crowd-pleaser at get-togethers.
- Quick and Easy Prep: With simple ingredients and straightforward steps, you’ll have them ready in under 40 minutes.
- Versatile Cooking Options: Whether you fry or air-fry, the rolls come out crispy and delicious every time.
Ingredients You’ll Need
The ingredients for this Cheeseburger Spring Rolls Recipe work together like a classic cheeseburger—savory beef, tangy pickles, melty cheese—with the added crunch of spring roll wrappers. Pick good-quality ground beef and fresh wrappers for the best results.

- Ground beef: I recommend 80/20 for that great fat ratio, which means juicy, flavorful filling.
- Onion: Finely diced for even cooking and to blend into the beef perfectly without big chunks.
- Ketchup: Gives that signature sweet tomato flavor we all love on a burger.
- Yellow mustard: Adds a tangy depth that balances the sweetness.
- Worcestershire sauce: A splash that boosts umami and adds a slight tang.
- Garlic powder: Brings warmth without overpowering the other flavors.
- Onion powder: Enhances the savory notes and deepens the taste.
- Kosher salt and black pepper: Essential for seasoning the meat just right.
- Shredded cheddar or American cheese: Melts beautifully inside for that gooey cheeseburger feel.
- Dill pickles: Chopped finely, they give a crunchy, tangy burst.
- Spring roll wrappers: Keep them covered with a damp towel so they don’t dry out while you work.
- Flour and water paste: This is your secret weapon for sealing those spring rolls tightly.
- Oil for frying or air-frying spray: Choose the cooking method that fits your mood or kitchen setup.
- Dipping sauces: I love ketchup mixed with mayo or a sweet chili and sour cream combo.
Variations
I love experimenting with this Cheeseburger Spring Rolls Recipe depending on what I have on hand or what flavor profile I’m craving—don’t be shy about making it your own.
- Vegetarian version: I swapped the beef for cooked lentils and diced mushrooms once, and it still delivered satisfying cheeseburger vibes without meat.
- Spicy kick: Adding a little diced jalapeño or a dash of hot sauce to the filling amps up the flavor beautifully.
- Cheese choices: Try pepper jack for some heat or smoked gouda for a rich twist.
- Baking option: If you want a lighter method, bake the rolls brushed with oil at 400°F until golden and crisp.
How to Make Cheeseburger Spring Rolls Recipe

Step 1: Cook the Beef and Onions to Flavorful Perfection
Start by heating your skillet over medium-high heat. Add the ground beef and diced onion together, cooking until the beef is browned with some crispy edges and the onions are tender—about 5 to 7 minutes. Drain all the excess grease really well; this keeps the filling from getting soggy inside the rolls. I like to cook a bit longer if you want those caramelized bits—they add so much depth!
Step 2: Mix in the Classic Cheeseburger Flavors
Once your beef mixture is off the heat, stir in ketchup, yellow mustard, Worcestershire sauce, garlic powder, onion powder, and plenty of salt and pepper to taste. Let this cool for about 5 minutes—that little pause helps the flavors marry and prevents the cheese from melting too soon. Then fold in shredded cheese and chopped dill pickles gently but thoroughly.
Step 3: Roll ‘Em Up with Care
Keep your spring roll wrappers covered under a damp kitchen towel while you work, so they don’t dry out and crack. Place about 2 tablespoons of the filling in the center of each wrapper. Then fold the sides inwards and roll tightly, like a burrito, sealing the edges with a flour and water paste—this prevents any sneaky filling leaks during frying. My biggest tip here: don’t overfill or the wrapper might tear!
Step 4: Fry Until Golden and Crispy
Heat about 2 inches of oil to 350°F in a deep pan. Fry 3 to 4 rolls at a time, turning frequently, for 3 to 4 minutes or until they turn a gorgeous golden brown. Drain on paper towels and give them a light spritz of oil if you want extra crispiness. Alternatively, air-fry them at 390°F for 10 to 12 minutes, flipping halfway—for a lighter, fuss-free version.
Pro Tips for Making Cheeseburger Spring Rolls Recipe
- Use 80/20 ground beef: It balances juiciness and flavor without too much grease.
- Dry the filling well: Excess moisture can make wrappers soggy and prone to tearing, so drain grease completely.
- Seal with care: Flour and water paste keeps your rolls intact—don’t skip this step!
- Don’t overcrowd the fryer: Fry in small batches so the temperature stays steady and rolls get crispy evenly.
How to Serve Cheeseburger Spring Rolls Recipe

Garnishes
I like to sprinkle chopped fresh parsley or chives on top for a pop of color and freshness. Plus, a little extra shredded cheese melts nicely over hot rolls, making them even more indulgent. Simple pickles on the side amp up that classic cheeseburger feel.
Side Dishes
My go-to sides are a crisp green salad with lemon vinaigrette or classic crispy fries (because, cheeseburgers!). Coleslaw or a crunchy cucumber salad also pairs beautifully, cutting through the richness.
Creative Ways to Present
For parties, I’ve arranged these rolls on a large platter with little dipping bowls scattered around—everyone digs in family-style. Another fun trick is to slice the rolls diagonally and fan them out, which looks extra inviting and shows off that cheesy center.
Make Ahead and Storage
Storing Leftovers
I like to cool any leftover rolls completely before wrapping them in foil or storing in an airtight container in the fridge. They keep well for 2 to 3 days without losing their texture or flavor.
Freezing
This Cheeseburger Spring Rolls Recipe actually freezes great! I freeze uncooked rolls on a parchment-lined tray until solid, then transfer them to a zip-top bag. When you have a craving, no thawing needed—just add a couple extra minutes to cooking time.
Reheating
To reheat, pop them in the air fryer or oven to keep them crispy—avoid microwaving if you want to retain that satisfying crunch. Around 5-7 minutes at 350°F works well in an oven, flipping halfway for even warmth.
FAQs
-
Can I make Cheeseburger Spring Rolls Recipe ahead of time?
Absolutely! You can prepare the rolls in advance and freeze them uncooked. Then simply fry or air-fry straight from the freezer, just adding a couple of minutes to the cooking time.
-
What’s the best way to keep spring roll wrappers from tearing?
Keep the wrappers covered with a damp towel at all times to prevent drying out, and don’t overfill the filling—remember, less is more when rolling tightly.
-
Can I bake these spring rolls instead of frying?
Yes! Brushing lightly with oil and baking at 400°F until golden will yield a deliciously crispy, lighter option.
-
What dipping sauces go best with this recipe?
I personally enjoy a classic ketchup and mayo blend or something with a little kick like sweet chili sauce paired with sour cream—both complement the cheeseburger flavors wonderfully.
Final Thoughts
I absolutely love how this Cheeseburger Spring Rolls Recipe turns the familiar into something playful and crispy. My family goes crazy for these at parties and easy weeknight dinners alike. I bet once you try them, you’ll find it’s a new favorite way to enjoy cheeseburger flavors with a fun twist. Give it a go—you’ll be thrilled with the crunchy, melty, savory goodness!
Print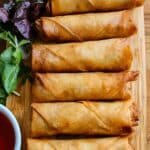
Cheeseburger Spring Rolls Recipe
- Prep Time: 20 minutes
- Cook Time: 15 minutes
- Total Time: 35 minutes
- Yield: 12 rolls 1x
- Category: Appetizer
- Method: Frying
- Cuisine: American
Description
Cheeseburger Spring Rolls combine the classic flavors of a cheeseburger with a crispy spring roll wrapper for a fun and tasty appetizer or snack. Filled with seasoned ground beef, cheese, onions, and pickles, these rolls are fried or air-fried to golden perfection and served with your choice of dipping sauces like a ketchup-mayo blend or sweet chili with sour cream.
Ingredients
Filling
- 1 pound ground beef (80/20 for best flavor)
- 1 small onion, finely diced
- 2 tablespoons ketchup
- 1 tablespoon yellow mustard
- 1 teaspoon Worcestershire sauce
- 1 teaspoon garlic powder
- 1 teaspoon onion powder
- Kosher salt, to taste
- Freshly cracked black pepper, to taste
- 1 cup shredded cheddar or American cheese
- 1/4 cup finely chopped dill pickles
For Wrapping and Sealing
- 12 spring roll wrappers (thawed if frozen)
- 2 tablespoons flour
- 3 tablespoons water (mixed with flour into a paste for sealing)
For Cooking
- Oil for frying (enough for 2 inches in pan) or oil spray for air frying
Dipping Sauces (Optional)
- Mix of ketchup and mayonnaise
- Sweet chili sauce and sour cream
Instructions
- Cook the Filling: Heat a skillet over medium-high heat. Add the ground beef and finely diced onion and cook until browned and edges are crispy, about 7 minutes. Drain all the grease from the pan.
- Season the Meat: Stir in ketchup, yellow mustard, Worcestershire sauce, garlic powder, onion powder, kosher salt, and freshly cracked black pepper. Cook for an additional minute then remove from heat and let cool for 5 minutes.
- Add Cheese and Pickles: Mix in the shredded cheddar or American cheese and finely chopped dill pickles until evenly combined.
- Prepare Wrappers: Keep spring roll wrappers covered under a damp towel to prevent drying out. Lay one wrapper flat on a clean surface.
- Fill and Roll: Place about 2 tablespoons of the cooled filling in the center of each wrapper. Fold the sides inward tightly and roll up like a burrito. Seal the edges using the flour and water paste to ensure they stay closed during cooking. Avoid overfilling to prevent bursting.
- Fry the Rolls: Heat 2 inches of oil in a deep skillet to 350°F. Fry 3 to 4 spring rolls at a time for 3 to 4 minutes until golden brown. Drain on paper towels to remove excess oil.
- Or Air Fry the Rolls: Alternatively, spritz the sealed rolls with oil spray and air-fry at 390°F for 12 minutes, flipping halfway through, until crispy and golden.
- Serve: Serve the hot spring rolls with your choice of dipping sauces such as a ketchup and mayonnaise mix or sweet chili sauce paired with sour cream.
- Freeze for Later: To freeze, place uncooked rolls on a parchment-lined tray and freeze until solid. Transfer to a zip-top bag and store. When cooking from frozen, add 1 to 2 minutes to the frying or air frying time.
Notes
- Use ground beef with 20% fat content for best flavor and moistness.
- Keep the spring roll wrappers covered with a damp towel to prevent them from drying and cracking.
- Do not overfill the spring rolls to avoid them bursting open while cooking.
- Drain the grease thoroughly after cooking the beef to avoid soggy rolls.
- For a healthier alternative, use the air fryer and spray rolls with oil instead of deep-frying.
- Freezing uncooked rolls makes for an easy ready-to-cook snack or appetizer on demand.
- Serve with a variety of dipping sauces to enhance the flavor.


